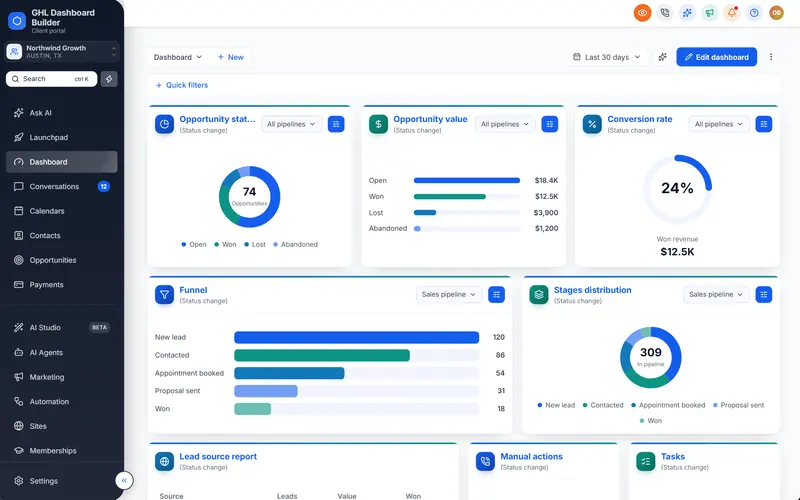
A client calls you on a Tuesday afternoon: “A lead messaged us on Friday and nobody saw it until today.” You check, and the message is right there in Conversations, unread. Nothing was broken. HighLevel stored it, and may even have sent an email about it. The problem is that nobody on the client’s team was looking at the right screen, and nothing on the screen they were looking at said “you have a new message”.
This guide covers notifications in HighLevel (also called GoHighLevel or GHL) from the agency’s point of view. It explains what GoHighLevel dashboard notifications include out of the box and where each setting lives, why messages still get missed, and how four everyday-use features (live counts, notification pop-ups, an appointments board and favourite pages) make a resold HighLevel feel like a product your clients actually work in. You will also find setup steps with menu paths, a comparison table, the limits, and what it costs.
What do GoHighLevel dashboard notifications include out of the box?
HighLevel has a solid notification system, but it is mostly about delivery, not display. Each user chooses which events alert them and through which channels, and workflows can alert chosen people about anything. What the interface itself does not show is a running count of what is waiting while someone works.
The personal settings live in each sub-account. HighLevel’s help article on managing notification settings in a sub-account gives the path as Settings, then My Profile, then Notifications. There, each user sets preferences for conversations, tasks and task reminders, daily summaries of due or overdue tasks, appointments, reviews and other account activity, and picks channels: Web App, Desktop, Email, Mobile App and SMS.
The second native tool is the workflow action. HighLevel’s Internal Notification workflow action sends alerts by email, in-app notification, SMS or WhatsApp to selected users, roles or teams, and it can run even when no contact record is involved. Agencies use it for things like “tell the sales manager when a form is submitted from the pricing page”.
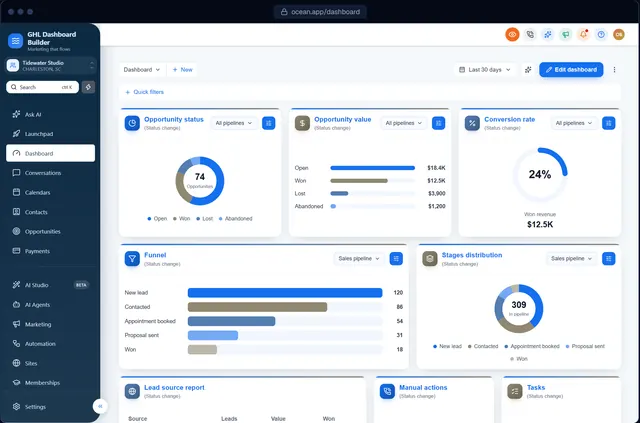
The third piece is the Dashboard itself. HighLevel’s sub-account Dashboard is built from widgets, and the help article on configuring general widgets explains how to edit what each one shows, add filters and set date ranges. Widgets are good for reporting: leads this month, pipeline value, appointment totals. They are less suited to “what needs me right now”.
| Native HighLevel tool | Where it lives | What it is good for | What it does not do |
|---|---|---|---|
| Notification preferences | Settings, My Profile, Notifications (per user) | Choosing which events alert each person, and by which channel | Show a count on the menu while someone works |
| Desktop notifications | Browser permission plus the Desktop channel | Alerts when the user is in another tab or app | Work if the browser or system blocks them |
| Mobile app notifications | The HighLevel or white-label mobile app | Alerts on the phone | Show anything inside the web dashboard |
| Internal Notification action | Automation, inside a workflow | Alerting chosen users, roles or teams about a specific event | Replace per-user preferences; each alert has to be built |
| Dashboard widgets | Dashboard, edit mode | Reports, totals and trends | Act as a live inbox of what is waiting |
| Conversation filters | Conversations | Finding unread conversations once you are there | Tell you to go there |
One detail matters more than it looks. HighLevel’s article on marking a conversation as read explains that opening a conversation does not mark it as read; it stays unread until a user replies or marks it read. That is a sensible design for teams, because a glance does not hide a message, but it means “unread” is the most reliable signal of work waiting, and it is only visible inside Conversations.
Why do agency clients still miss messages in HighLevel?
Because notifications arrive where people are not looking. Email alerts land in a crowded inbox, desktop alerts are blocked by a browser permission or a focus mode, and the mobile app is switched off on a work phone. Meanwhile the person sitting in HighLevel sees no sign of new work until they open the right page.
For an agency, the consequence is not abstract. Many HighLevel clients are small businesses whose front-desk person has the dashboard open all day: a clinic receptionist, a roofing office manager, a gym’s membership coordinator. They are in the software, on the Contacts or Calendars page, and the message that matters is one click away in Conversations with nothing pointing to it.
HighLevel’s own users have asked for clearer signals. A request on HighLevel’s ideas board asks to highlight unread messages and add a “go to unread” button or filter in Conversations. Filters for unread conversations exist today, as the overview of conversation filters shows, together with bulk Mark as Read and Mark as Unread, but they help only once you are on the page.
Response speed is where this costs money. In a well-known study, Harvard Business Review’s authors audited 2,241 US companies by sending each a web lead and timing the reply. In The Short Life of Online Sales Leads, 37 percent responded within an hour, 16 percent within one to 24 hours, 24 percent took longer than 24 hours, and 23 percent never responded. A separate analysis in the same article found that firms that tried to contact a lead within an hour were nearly seven times as likely to qualify it as firms that waited even an hour longer.
Source: Harvard Business Review, The Short Life of Online Sales Leads (Oldroyd, McElheran, Elkington, 2011)
The study is from 2011 and covers companies in general, not HighLevel users, so treat it as a reason to care about speed rather than a forecast for your clients. The practical point for an agency is narrower: when a client’s team misses a lead, the client blames the software, and the software carries your brand. Signals that sit in the dashboard itself, where the team already works, close the gap that email and push alerts leave open.
How does GHL Dashboard Builder add live counts, pop-ups and an appointments board?
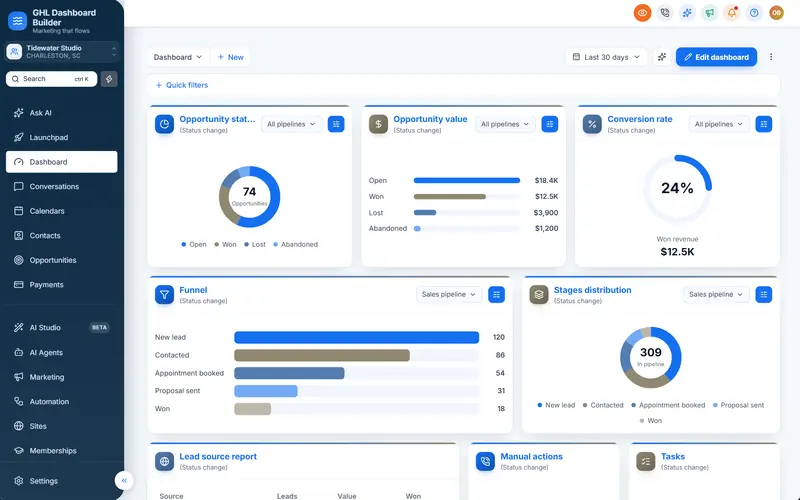
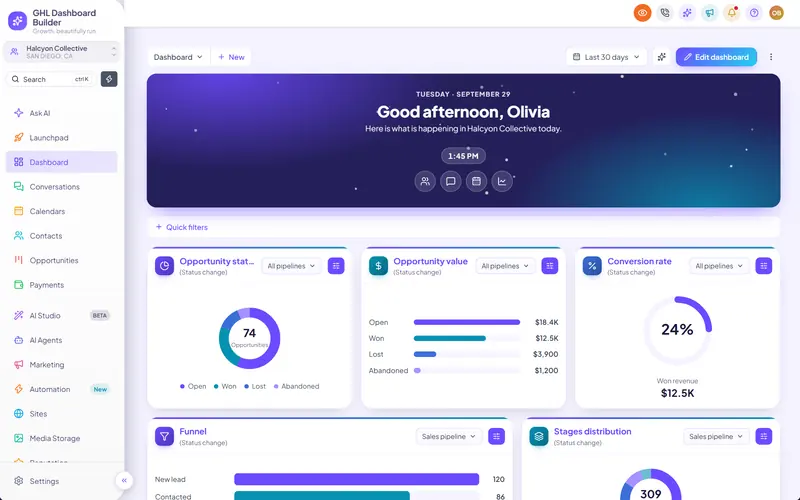
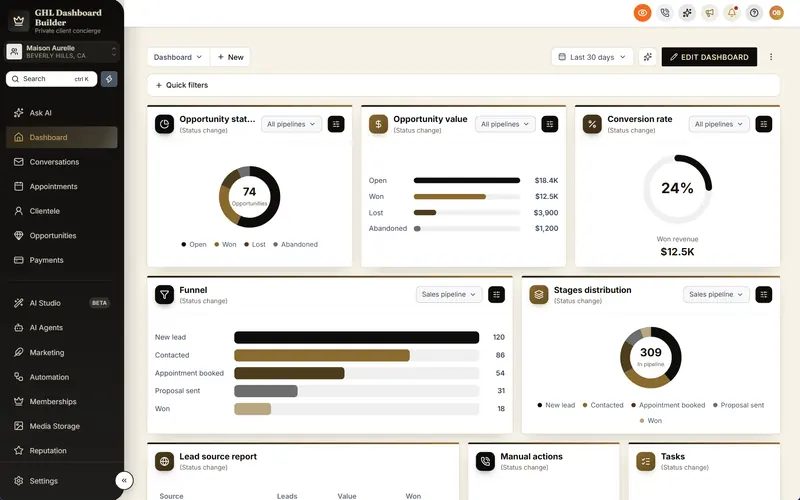
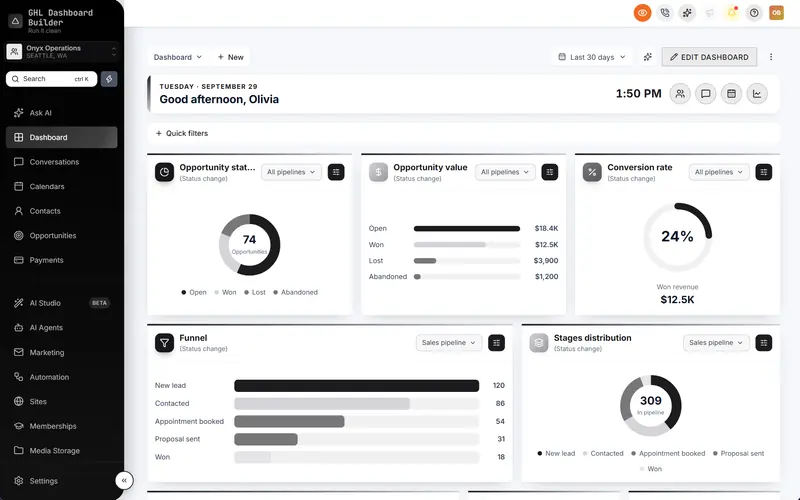
GHL Dashboard Builder adds four everyday-use features on top of HighLevel’s own screens: live counts on the menu and in the welcome banner, notification pop-ups on any page, an appointments board at the top of the Dashboard, and favourite pages pinned to the menu. They are part of a design you install once with two lines in HighLevel’s Custom Code.
GHL Dashboard Builder is an independent design service that turns the standard HighLevel (GoHighLevel) dashboard into a branded platform: your colors, menu, login design, privacy mode and your clients’ language, installed with two lines of code. It is not affiliated with HighLevel. The design restyles HighLevel’s interface in the browser and adds these features through HighLevel’s own Custom Code settings; HighLevel’s notification preferences, workflows and mobile app keep working exactly as before.
Infographic
Dashboard signalsby the numbers
7x
likelier to qualify a lead when contacted within an hour rather than an hour later
(Harvard Business Review, 2011)
5
live figures: unread conversations, appointments today, tasks due, new opportunities, overdue invoices
(GHL Dashboard Builder)
1 min
how often live counts refresh while HighLevel is open
(GHL Dashboard Builder)
8
favourite pages each person can pin at the top of the menu
(GHL Dashboard Builder)
Sources: Harvard Business Review, The Short Life of Online Sales Leads (2011); GHL Dashboard Builder product features.
Here is what each feature does for the people who use your clients’ sub-accounts, and which plan includes it. All plans are one-time payments, plus a one-time $100 setup fee for which we install and configure the design in your HighLevel.
| Feature | What it does for your agency’s clients | Plan |
|---|---|---|
| Live figures in the welcome banner | Today’s numbers at the top of the Dashboard, each opening its page | Starter and up |
| Live counts on the menu | Badges such as unread conversations on Conversations and appointments today on Calendars | Pro and up |
| Notification pop-ups | New messages, bookings, payments and form submissions slide in on any page, with Reply, Mark read and Call | Starter and up |
| Appointments board | The next 3 to 8 appointments from every calendar, in a card at the top of the Dashboard | Starter and up |
| Favourites | A star in the header pins any page to the top of the menu, up to 8 per person | Pro and up |
| Welcome banner | A greeting by first name, the date, a clock and quick links, in 12 designs and 9 layouts | Starter and up |
| Privacy mode | Blurs client details on screen shares and keeps pop-ups quiet while it is on | Starter and up |
These sit alongside the rest of the product: 18 features in total, 27 templates, 15 languages with 3 right-to-left, and a menu editor for HighLevel’s 19 menu items. The full list is on the features overview. Installation takes about 5 minutes once the design is ready, and on every plan we do it for you as part of the setup fee.
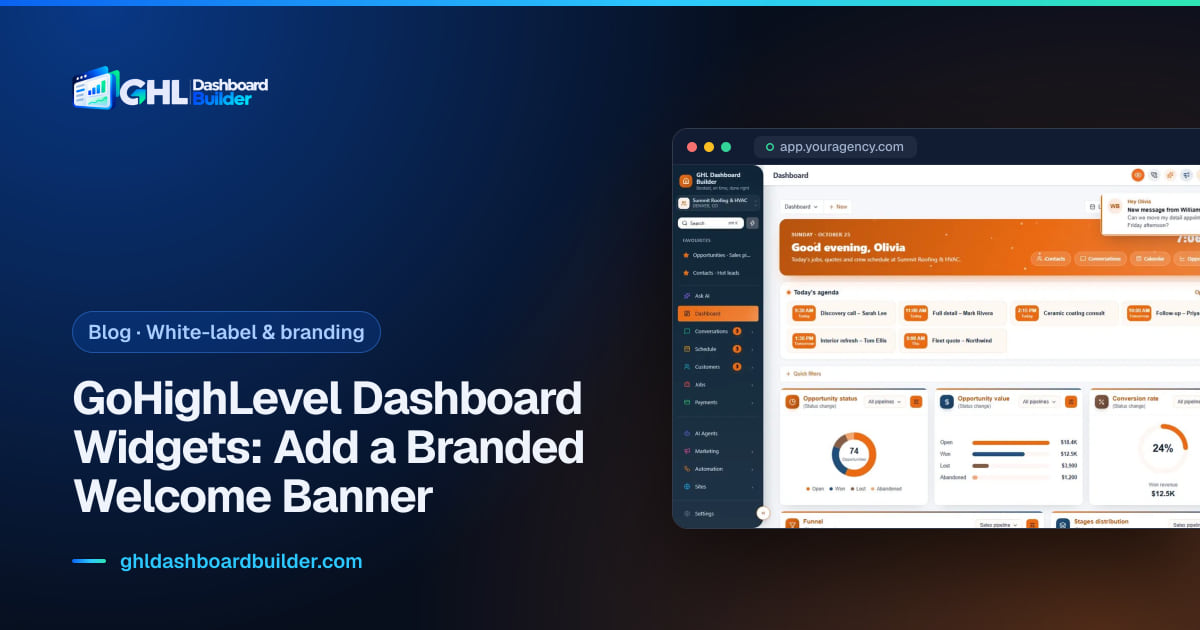
What the client’s team sees afterwards is the same HighLevel, with a few extra signals in their brand colors and language. The receptionist on the Calendars page sees a “3” next to Conversations. A new booking slides in at the corner with “Hey Maria” and the time. The Dashboard opens with today’s appointments at the top. Nothing about their data, permissions or workflows changes.
Two templates show these features switched on together. Ember is a warm, dark design with live figures in a spotlight banner, live menu counts and pop-ups for every new notification. Shine, made for auto detailers and coating shops, has live numbers in the welcome banner and a chime when a customer messages.
How do live counts work on the HighLevel menu?
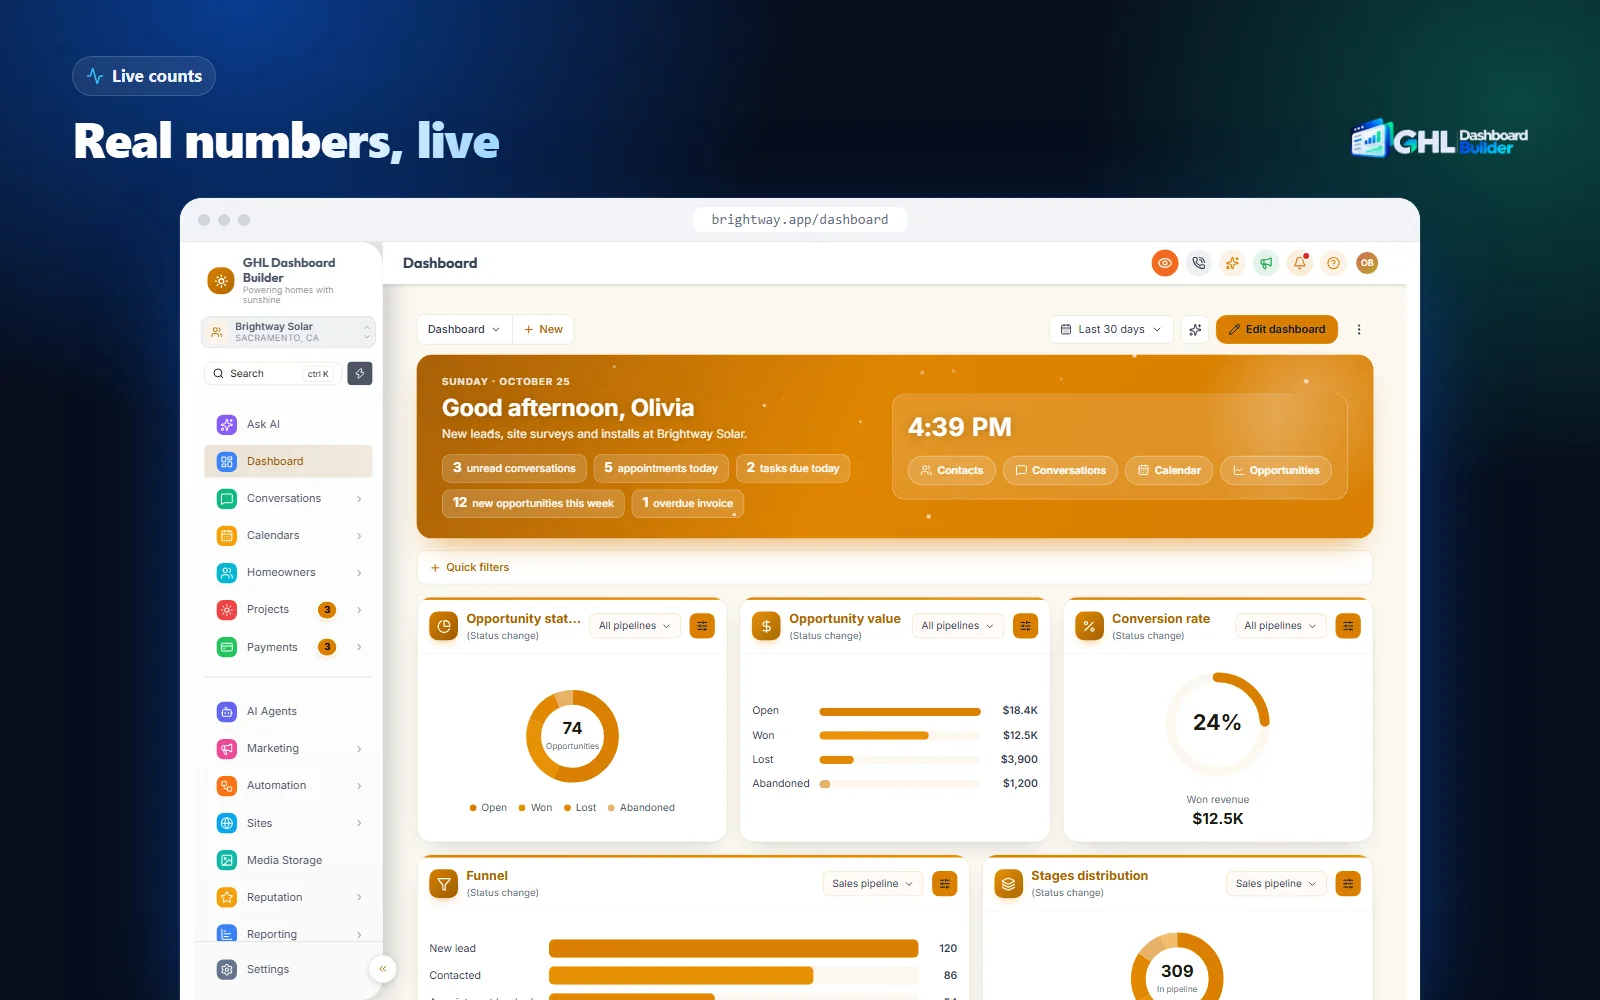
Live counts put real numbers from the account next to the menu items people use and inside the welcome banner. They read the sub-account the user is in, while HighLevel is open in their browser, and refresh every minute. A user sees what is waiting without opening each page to check.
HighLevel’s menu does not show counts on its own at the time of writing. A user who wants to know whether anything new has arrived opens Conversations, applies the unread filter, then goes to Calendars to see today’s list, then to Contacts for tasks. Live counts turn those checks into numbers on the menu itself.
What the counts show
There are five figures, and you choose which appear on the menu and which in the welcome banner:
- Unread conversations, shown on Conversations.
- Appointments today, shown on Calendars.
- Tasks due, shown on Contacts.
- New opportunities this week, useful for sales-led clients.
- Overdue invoices, useful for clients who bill through HighLevel.
In the welcome banner, each figure is a link that opens its page. A clinic owner opening HighLevel in the morning sees “4 appointments today, 2 unread conversations” and reaches either list with one click.
How they behave
The counts load after the page, so they do not hold up HighLevel’s own loading, and they refresh once a minute in the background. Each user sees their own sub-account’s numbers. Nothing is copied to another service: the figures are read in the user’s browser from the account they are already signed into.
Because the counts follow HighLevel’s own definition of unread, a conversation someone opened without replying still counts. That matches how HighLevel treats it and is usually what a busy front desk wants: the badge stays until someone has dealt with the message, not just glanced at it.
Plans differ here. Live figures in the welcome banner come with every plan from Starter. Badges on the menu come with Pro, together with the menu editor, because they sit on the menu items the editor controls. If you rename Contacts to Patients or Opportunities to Jobs, the count follows the renamed item; our guide to GoHighLevel sidebar customization covers the menu side in detail.
What do the notification pop-ups do, and how do quiet hours work?
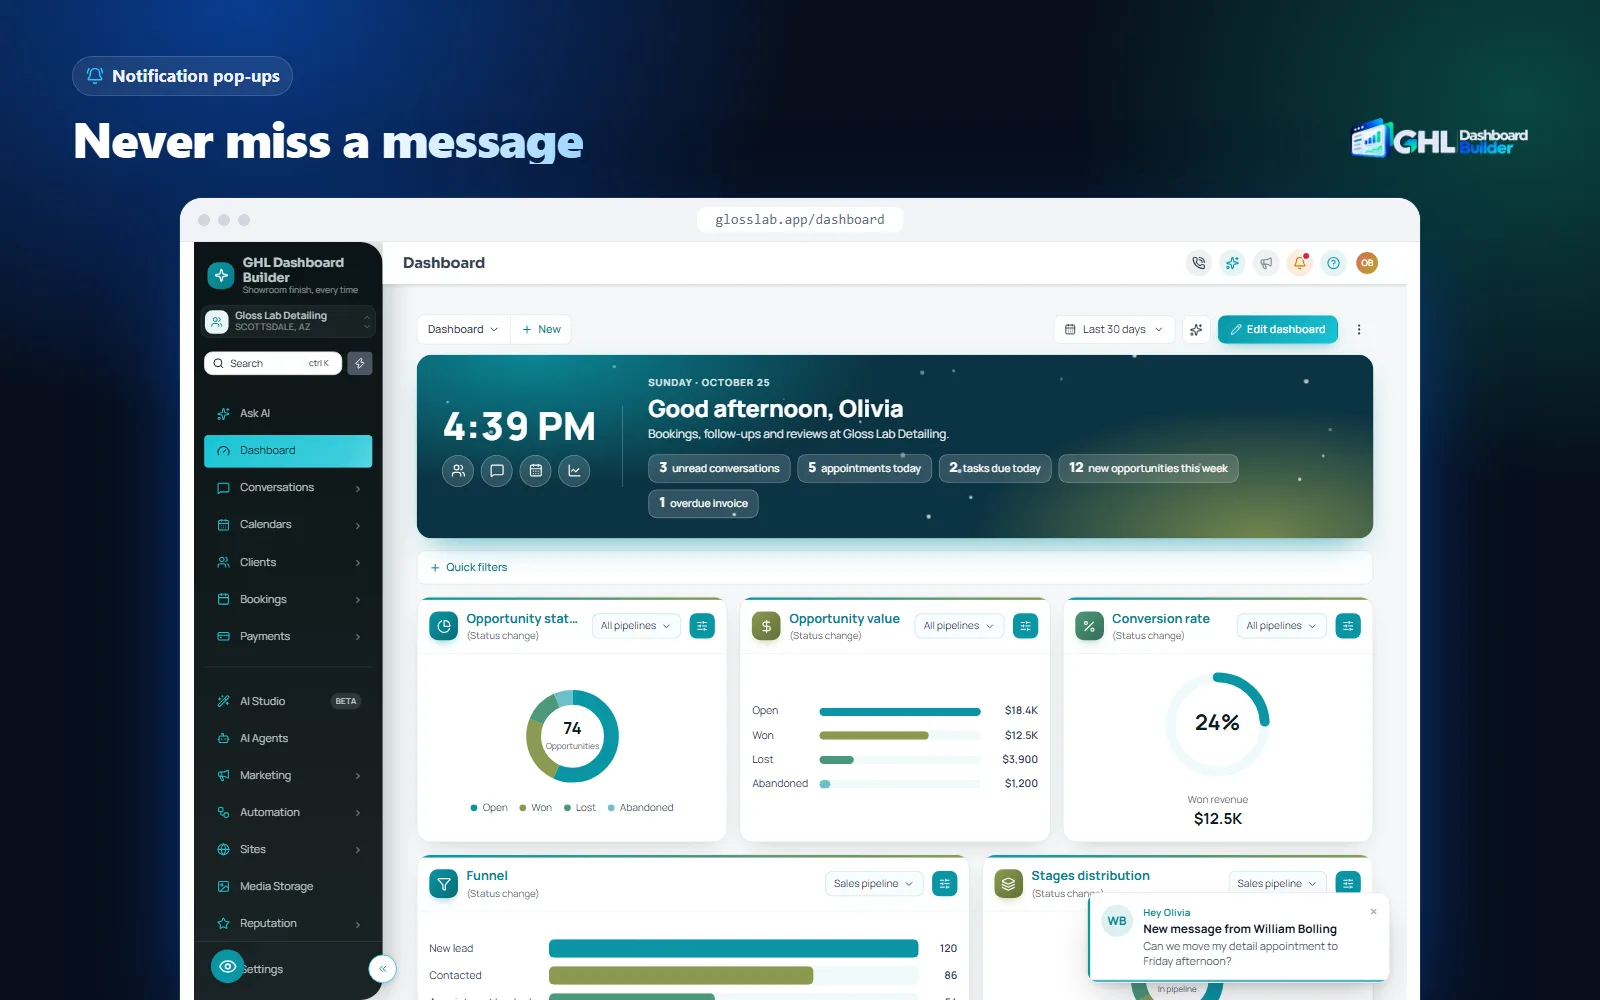
Notification pop-ups slide in on whatever HighLevel page the user is on when a new message, booking, payment or form submission arrives. Each one greets the user by first name and, for messages, offers Reply, Mark read and Call right on the pop-up. Quiet hours and an optional chime keep them from becoming noise.
The difference from a browser notification is location and branding. A desktop notification appears in the operating system’s corner, styled by Windows or macOS, and only if permission was granted. A pop-up from your design appears inside HighLevel, in your brand colors and in the language of the design, so it reads as part of your platform rather than a system message.
What you can set
- Which events pop up: messages, appointments, payments, forms and other notifications, each switched on or off.
- Only my conversations: message pop-ups only for conversations assigned to the signed-in user, which keeps a shared inbox from pinging everyone.
- The greeting: “Hey {name}” by default, where {name} becomes the user’s first name; you can change the wording.
- Position and timing: any of the four corners, shown for 3 to 20 seconds, and paused while the pointer is on it.
- Quiet hours: no pop-ups between two times you choose, such as 19:00 to 08:00, on the user’s own clock.
- Chime: an optional soft sound with each pop-up, off by default.
- Tab counter: the browser tab shows a number, such as “(3) Dashboard”, for notifications that arrived while the tab was not in view.
Why the actions matter
A pop-up that only says “new message” sends the user off to find it. The Reply, Mark read and Call buttons cut that out: Reply opens the conversation, Mark read clears it when it needs no answer, and Call starts a call to the contact. For the receptionist example from the start of this guide, a Friday lead would have appeared as a pop-up on whatever page was open, with Reply one click away.
Pop-ups also respect privacy mode. By default they stay silent while privacy mode is hiding personal details, so a client’s name and message preview do not slide onto a screen you are sharing on a sales call. Our guide to hiding client data in GoHighLevel during demos explains what privacy mode blurs and how to use it on calls.
The one requirement is that HighLevel is open in a browser tab. Pop-ups are part of the web app; they cannot appear when the browser is closed, and they do not reach the mobile app. That is exactly why HighLevel’s own desktop, email, mobile and SMS channels remain worth configuring, as the setup steps below show.
If you want to see these signals in your own colors before reading further, the builder shows them on a live copy of HighLevel’s screens. It never connects to your account.
How does the appointments board show today’s schedule on the Dashboard?
The appointments board is a card at the top of HighLevel’s Dashboard that lists the next appointments from every calendar in the sub-account, with the time and title of each. You choose to show between 3 and 8. One click on an appointment opens its calendar, where it is changed as usual in HighLevel.
For appointment-driven businesses, this is often the most-used part of the Dashboard. A dental practice, a salon or a home-services company runs its day by the schedule. Without the board, the team opens Calendars, picks the right view and the right calendar, and repeats that whenever someone asks “who’s next?”. With it, the answer is on the first screen after sign-in.
The board sits under the welcome banner, in your brand colors, and updates while HighLevel is open. It reads every calendar in the sub-account, so a business with separate calendars for each staff member or each service sees one combined list of what is coming up next.
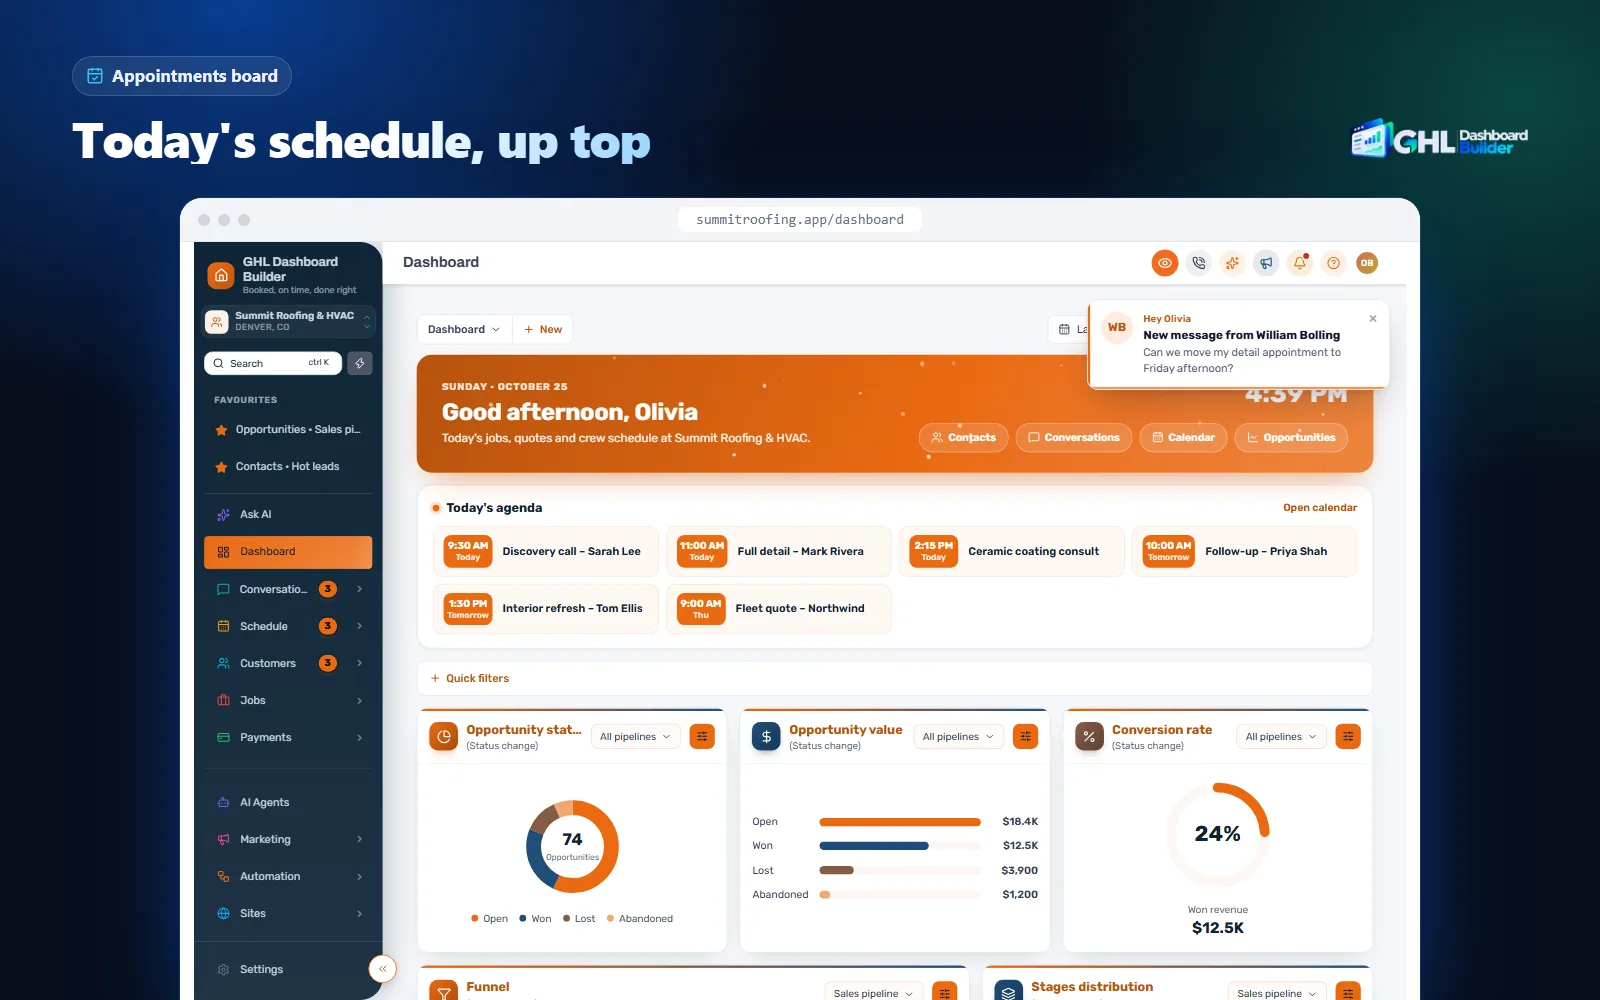
The board does not replace HighLevel’s calendar. It shows what is next and sends you to the calendar for anything else: rescheduling, cancelling, adding notes. It also does not replace HighLevel’s appointment widgets, which are better for counts and trends over a date range. Think of the widgets as the report and the board as today’s to-do list.
Paired with the welcome banner, the board turns the Dashboard into a proper start screen: a greeting by first name, the date and a clock, quick links to the pages the team uses, today’s figures, then the next appointments. Our GoHighLevel dashboard customization guide shows how the banner and the rest of the Dashboard fit together.
Can you pin favourite pages in GoHighLevel?
Not with HighLevel alone at the time of writing; there is no built-in favourites list in the menu. GHL Dashboard Builder adds a star to HighLevel’s header: click it on any page, and that page is pinned at the top of the menu. Each person keeps up to 8 favourites, saved in their browser for that sub-account.
Favourites solve a quieter problem than notifications, but one users feel daily. A sales rep lives in one pipeline. An office manager checks the same smart list every morning. An owner looks at one report on Fridays. In standard HighLevel, each of those is several clicks deep, and the path changes depending on how the account is organised.
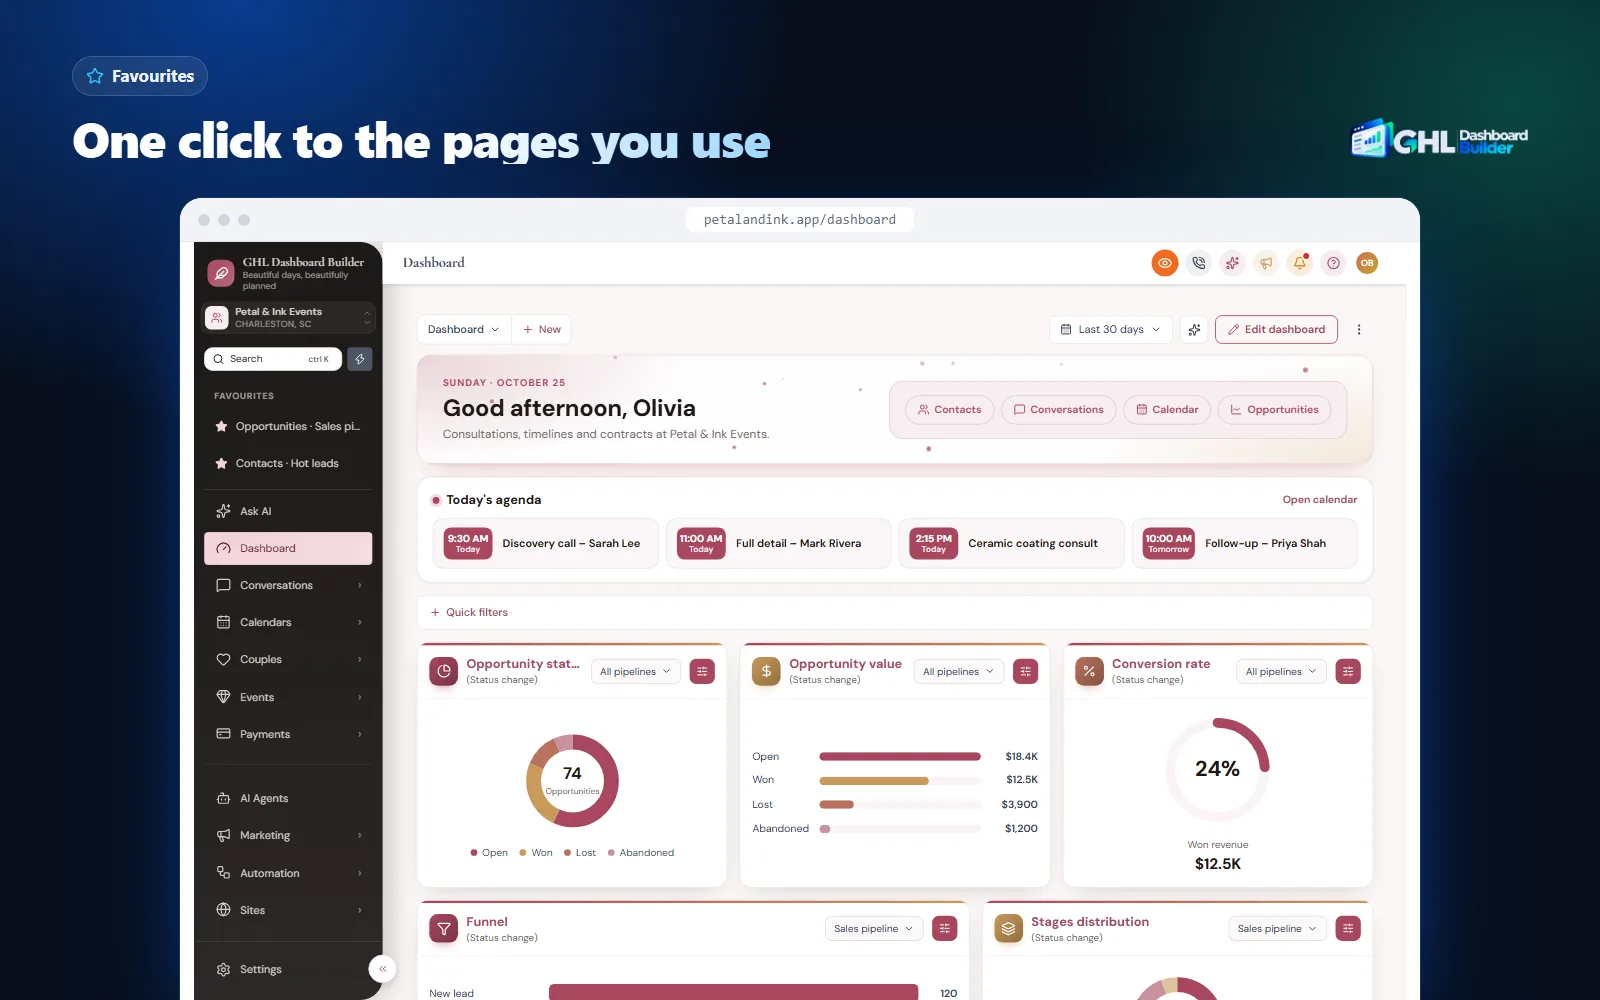
Any page you can open in HighLevel can be pinned, including a specific pipeline or smart list. Favourites are personal: a rep’s pins do not appear for the rest of the team, so nobody’s menu fills up with someone else’s shortcuts. They work with renamed and reordered menus, so a favourite stays put after you rename Opportunities to Deals.
Two trade-offs follow from saving favourites in the browser. A user who switches to another computer or another browser starts with an empty list there, and clearing the browser’s site data clears the favourites. For most teams that is a fair price for having no server storage of who clicked what, but it is worth telling clients so they are not surprised.
Favourites come with the Pro plan, alongside the menu editor and live menu counts. Together they make the menu feel personal and current: the items your client’s industry uses, in their words, with numbers on them and their own shortcuts on top.
How do you set up GoHighLevel dashboard notifications step by step?
Set up the native layer first, then the dashboard layer. HighLevel’s own preferences cover the moments when no one has HighLevel open; live counts, pop-ups and the appointments board cover the hours when someone does. The cards summarize the routine; the full steps with menu paths follow.
Infographic
GoHighLevel dashboard notificationsin six steps
- 1
Set preferences
Each user picks events and channels in My Profile.
- 2
Allow desktop
Grant the browser permission for HighLevel's site.
- 3
Add workflow alerts
Use Internal Notification for events that need a person.
- 4
Design the signals
Pick counts, pop-ups and the board in the builder.
- 5
Install
Two lines in Custom Code, installed by us.
- 6
Test with the team
Send a test message and booking and watch.
Step 1: Set each user’s notification preferences
- Switch into the client’s sub-account.
- Open Settings, then My Profile, then the Notifications tab.
- Under the preferences, choose which events alert this user: conversations, tasks and reminders, daily task summaries, appointments, reviews and other activity.
- Tick the channels: Web App, Desktop, Email, Mobile App and, where useful, SMS.
- Save at the bottom of the page. Repeat for each team member, or ask each user to do it, since the settings are personal.
Step 2: Allow desktop notifications in the browser
- With HighLevel open, click the site information icon to the left of the address in the browser.
- Set Notifications to Allow for your HighLevel domain.
- Check that the operating system allows the browser to show notifications and that focus or do-not-disturb mode is not hiding them.
- Ask each user to do the same on their own computer, because the permission belongs to the browser, not to HighLevel.
Step 3: Add workflow alerts for events that need a person
- Open Automation and create or open a workflow.
- Add the trigger, such as a form submission, a new appointment or a payment.
- Add the Internal Notification action and choose the type: email, in-app, SMS or WhatsApp.
- Choose who receives it: a user, a role, a team or the assigned user.
- Write a short message with the contact’s details inserted, publish the workflow and test it.
Step 4: Design the dashboard signals
- Open the free builder and pick a template, or start from your brand colors and logo.
- In the Live updates section, choose which counts appear on the menu and which figures in the welcome banner.
- Switch on the appointments board and set how many appointments it shows, from 3 to 8.
- Switch on notification pop-ups: pick the events, the corner, the greeting, quiet hours, the chime and whether message pop-ups are only for the user’s assigned conversations.
- Switch on favourites if you are on Pro.
- Check the preview on desktop, tablet and phone. The preview shows sample numbers and a sample pop-up in your design.
Step 5: Install it in HighLevel
- Choose a plan; on every plan we install the design for you as part of the one-time $100 setup fee.
- The install is one CSS line in Custom CSS and one JavaScript line in Custom JavaScript, under Settings, Company, Whitelabel, Custom Code in the agency view.
- To try it with one client first, limit the design to chosen sub-accounts by link or Location ID, as described below.
Step 6: Test with the client’s team
- Sign in as a user with the client’s role, in a normal browser window.
- Send a test SMS or chat message to the sub-account and watch for the pop-up and the count on Conversations.
- Book a test appointment and check the appointments board and the Calendars count.
- Turn on privacy mode and send another message to confirm the pop-up stays quiet.
- Remove the test data, then walk the client’s team through the new signals in five minutes on a call.
Native HighLevel notifications or a branded layer: which do you need?
Most agencies need both. HighLevel’s channels reach people who are not in the software, by email, push and SMS. A branded dashboard layer reaches people who are in the software but on the wrong page. The table shows where each one wins, so you can decide what to set up for each client.
| Question | HighLevel’s own notifications | Dashboard layer (GHL Dashboard Builder) |
|---|---|---|
| Works with HighLevel closed | Yes: email, mobile app, SMS, desktop when the browser is running | No: needs HighLevel open in a browser tab |
| Shows counts on the menu | No, at the time of writing | Yes, refreshed every minute (Pro) |
| Appears on the page being used | As a browser or system notification, if permitted | As a branded pop-up inside HighLevel |
| Actions from the alert | Opens HighLevel | Reply, Mark read and Call on message pop-ups |
| Your brand and language | System styling | Your colors, your wording, 15 languages for the design |
| Quiet hours | Per channel choices in each user’s settings | Quiet hours set in the design, on the user’s clock |
| Screen-share safe | Depends on what the system shows | Pop-ups stay quiet while privacy mode is on |
| Per-event routing to roles or teams | Yes, through Internal Notification in workflows | No; pop-ups follow the signed-in user, optionally only their conversations |
| Cost | Included in HighLevel | One-time plan plus one-time $100 setup |
A simple rule of thumb works for most client types:
- Owner-operators who live on their phone: rely on HighLevel’s mobile app and SMS alerts. Add the welcome banner and appointments board so the Dashboard is useful when they do sit down.
- Teams with a front desk in HighLevel all day: add live counts and pop-ups. This is where missed messages happen and where on-screen signals help most.
- Sales teams working pipelines: add favourites and live counts for new opportunities, plus workflow alerts to the assigned user for new leads.
- Clients you demo or screen-share with: add privacy mode alongside the pop-ups, so a new message never appears with a name on a shared screen.
For a broader comparison of HighLevel’s built-in branding with code-based designs, our guide to making GoHighLevel look like your own software covers the domain, logo, app and interface side by side.
What are the limits, and what can go wrong?
On-screen signals only exist while HighLevel is open in a browser, and they depend on custom code that HighLevel does not officially support. Knowing both limits up front lets you set clients’ expectations and keep the native channels in place as the safety net.
- Browser only. Live counts, pop-ups, the appointments board and favourites run in the HighLevel web app. A closed tab or a closed laptop shows nothing; the mobile app does not load an agency’s custom code. HighLevel’s own email, mobile app and SMS notifications cover those moments.
- Custom code is unsupported by HighLevel. The design installs through HighLevel’s Custom Code boxes, which HighLevel describes as unsupported. A large HighLevel update can occasionally require a refresh of the theme. Starter and Pro include 12 months of updates that cover this, then optional at $99 a year; Agency includes lifetime updates.
- Counts refresh every minute, not instantly. A message that arrives just after a refresh shows on the menu at the next one. For a front desk that is fast enough; for anything time-critical, add a workflow alert by SMS.
- Favourites live in the browser. They do not follow a user to another computer or browser, and clearing site data clears them.
- Quiet hours follow the user’s clock. A team spread across time zones gets quiet hours in each person’s local time, which is usually what you want, but worth knowing when you set them.
- The language covers the design, not all of HighLevel. Pop-ups, counts and the menu follow the design’s language, among 15, with right-to-left for Arabic, Urdu and Hebrew. Text inside HighLevel’s own pages, system emails and the mobile app follows HighLevel’s language settings. Our languages page lists what is translated.
- One design per set of sub-accounts. One install shows one design in the sub-accounts you choose. If different clients need different looks at the same time, talk to us before you buy.
There is also a human limit. More signals are not always better. A pop-up for every event, a chime on each, and five badges on the menu will train a team to ignore all of them. Start with unread conversations and appointments today, pop-ups for messages and bookings, and add more only when the team asks for them.
How do you roll this out to one client first?
Pilot it in one sub-account. You still install one code at agency level, but you limit the design to a chosen client by pasting their sub-account link or Location ID. That client gets the counts, pop-ups and board; every other sub-account and the agency view keep their current look until you are ready.
A pilot is the right way to introduce notifications in particular, because they change how a team works, not just how the screen looks. Pick a client with a busy front desk and a friendly contact. Turn on a small set of signals, as suggested above, and ask after one week which ones they used and which they ignored.
Then adjust before adding more clients. You may find that the chime annoys an open-plan office, that “only my conversations” suits a team with assigned inboxes, or that the appointments board should show 8 items rather than 5 for a busy clinic. Each of these is a setting in the design, and changes reach HighLevel when you press Deploy to live, without touching the Custom Code boxes again.
Once the pilot works, add more sub-accounts to the same design or switch it to the whole agency. If you sell the branded dashboard as part of a premium tier, the pilot client is also your best demonstration for the next sale. Industry pages such as our guide to GoHighLevel for home services show how appointment-led businesses use these signals.
What do these features cost?
All four features come with one-time plans, with no monthly fee. Starter at $280 includes the welcome banner with live figures, the appointments board, notification pop-ups and privacy mode. Pro at $480 adds live counts on the menu, favourites and the menu editor. Every plan has a one-time $100 setup fee, for which we install and configure the design in your HighLevel.
| Plan | One-time price | Setup fee (one-time) | Notification features included | Updates |
|---|---|---|---|---|
| Starter | $280 | Starter | $280 | |
| Pro | $480 | Pro | $480 | |
| Agency | $880 | Agency | $880 |
Starter includes 1 design, Pro up to 3 and Agency up to 100, and each design can cover the whole agency or only the sub-accounts you choose. You can upgrade later by paying the difference between plans; the setup fee is not charged again. The pricing page has the full plan contents, and the FAQ answers common questions about safety, installation and data.
How you charge your clients is up to you. You can fold the branded dashboard into a premium tier, a setup fee or your monthly plan; you set the price and keep what you charge, with no per-client fee from us.
What to do next
- Audit the native settings for one client today. Open Settings, My Profile, Notifications for each user in their sub-account and confirm the right events and channels are ticked, including the mobile app.
- Fix desktop permissions. Ask each user to allow notifications for your HighLevel domain in their browser, and check focus modes.
- Add one workflow alert with the Internal Notification action for the event your client cares about most, such as new web leads to the assigned user.
- Try the dashboard signals in your brand in the free builder: live counts, pop-ups and the appointments board on a copy of HighLevel’s screens.
- Pilot with one client, limit the design to their sub-account, and ask after a week which signals the team actually used.