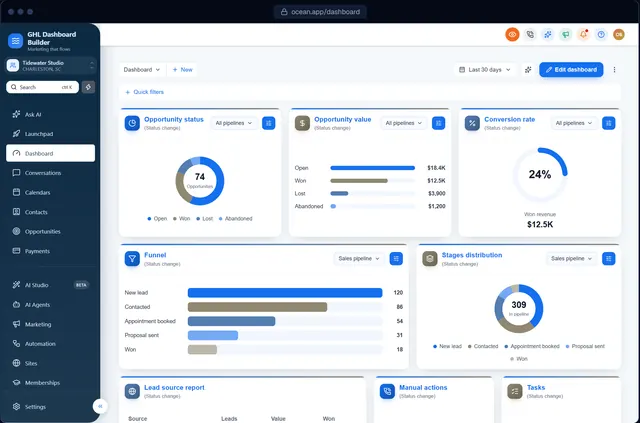
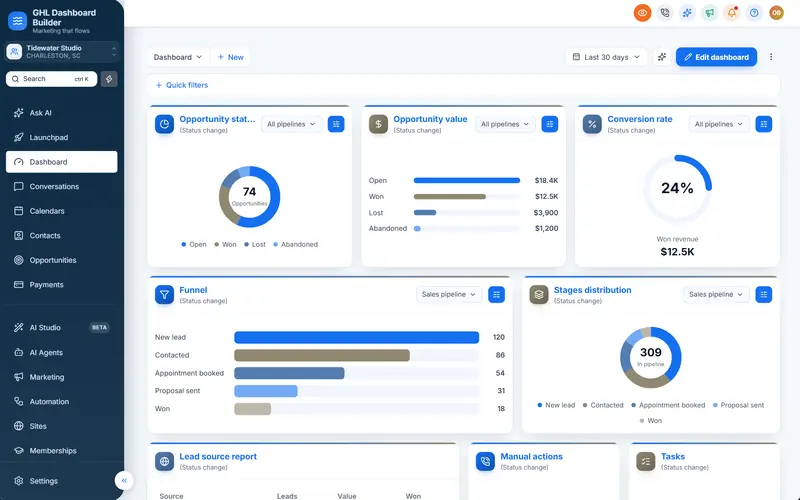
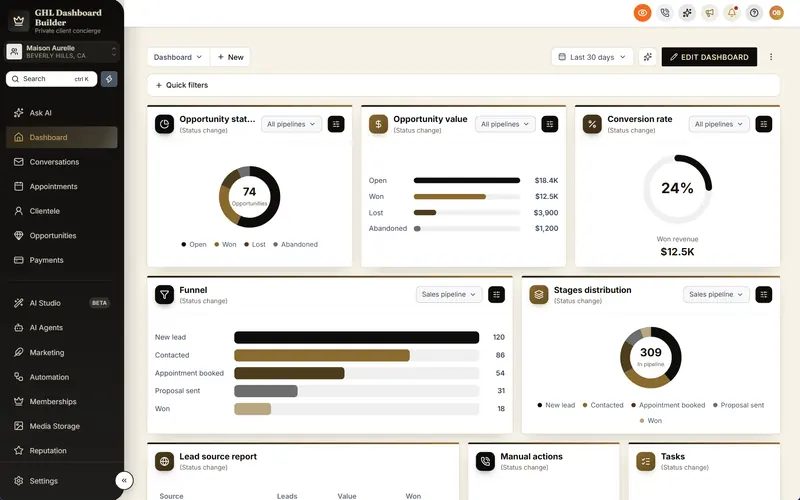
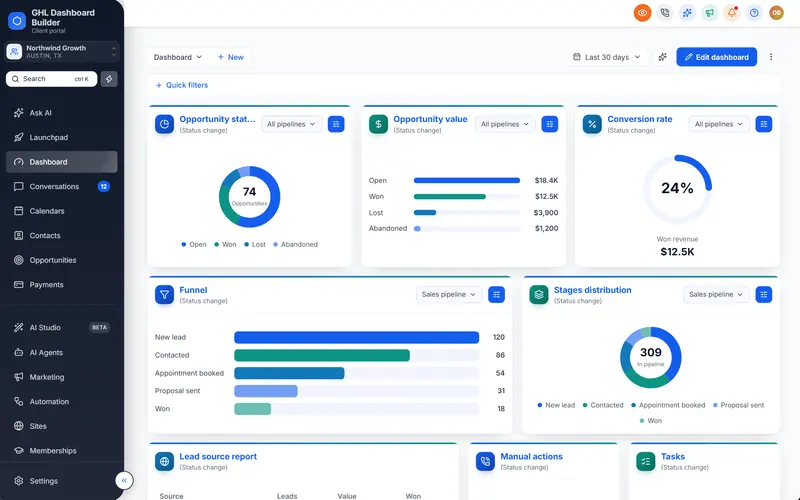
Your client logs in on a Monday morning and lands on a wall of charts: opportunity values, lead sources, a conversion funnel, a date picker set to “last 30 days”. Every number is useful to you. To a dental receptionist or a roofing office manager, it says nothing about today, nothing about where to click first, and nothing about the agency they pay. The first screen of the software you resell looks like a report, not like their platform.
This guide covers GoHighLevel dashboard widgets from an agency’s point of view. HighLevel (also called GoHighLevel or GHL) gives every sub-account a Dashboard built from widgets, and you will see exactly what those widgets do, where each setting lives and what they cannot do. Then it shows how to add a branded welcome banner above them, with a greeting by first name, the date, a clock, quick links and live figures, how to install it, what it costs, and the limits you should tell clients about.
What are GoHighLevel dashboard widgets?
GoHighLevel dashboard widgets are the report cards on a sub-account’s Dashboard page: charts, totals, tables and funnels for opportunities, conversations, appointments, ads and other modules. Users with edit rights add them from a Widget Gallery, then arrange, resize, filter and theme them. They are built to measure the business, not to welcome the person using it.
HighLevel’s help article on adding dashboard widgets with the Widget Gallery describes the flow: open Dashboard, pick the dashboard, choose Edit Dashboard, then Add Widget. The gallery shows a preview and a description for each chart before you add it, and you can search it or filter it by module. Some categories appear only when the module is in use, such as custom object widgets or widgets for services and rentals.
The Dashboard page has two modes. HighLevel’s article on the sub-account Dashboard page in view or edit mode explains that view mode is for reading widgets and changing filters and dates, while edit mode is where you drag widgets into a new arrangement, add or delete them, and change the dashboard’s theme or title.
Themes, permissions and the default dashboard
Three more native settings matter to an agency. First, themes: HighLevel’s guide to customizing dashboard themes shows how to pick a predefined theme or build your own in the Themes section of edit mode, for the whole dashboard or for a single widget. The changelog entry on themes for dashboards and widgets lists what a custom theme can color, including widget titles, widget backgrounds, metrics, charts and links.
Second, permissions. HighLevel’s article on managing dashboard permissions describes four levels: Full, Edit, View and No Access. Full can create, edit, share and delete dashboards; Edit can change dashboards and widgets but not delete them; View is read-only. A dashboard can stay private or be shared by role or by user.
Third, the default dashboard. According to HighLevel’s guide on setting a default dashboard, the three-dot menu on a dashboard has Set as default dashboard, and the default is the one users see whenever they open the Dashboard page. The same menu offers templates and, for agency roles, duplicating a dashboard to another sub-account.
| Native HighLevel setting | Where it lives | What it gives your clients | What it does not do |
|---|---|---|---|
| Widget Gallery | Dashboard, Edit Dashboard, Add Widget | Charts, totals, tables and funnels per module | Free-form content such as a greeting or a row of links |
| Edit mode | Dashboard, Edit Dashboard | Drag, resize, add and delete widgets | Add anything above or outside the widget grid |
| Dashboard and widget themes | Edit mode, Themes section | Colors for widget titles, backgrounds, metrics, charts and links | Restyle the menu, header or the rest of HighLevel |
| Permissions | Dashboard, Manage Permissions | Who can view, edit or manage each dashboard | Change what a dashboard can contain |
| Default dashboard | Three-dot menu, Set as default dashboard | The dashboard everyone lands on | Personalize it per user by name |
| Templates and duplicating | Add Dashboard, or three-dot menu | Reuse a dashboard layout across sub-accounts | Carry your brand beyond the widgets |
Plan availability for custom dashboards has changed over time, and HighLevel’s own help pages have said different things in different years. Check your own agency and sub-account before you promise a client a specific dashboard feature. Menu labels also move; the paths above match HighLevel’s help center at the time of writing.
Why does the first screen matter so much for agency clients?
Because the Dashboard is the first thing a client sees every time they log in, and the impression it gives becomes the impression of your service. Native widgets answer “how is the business doing?” They do not answer “where do I start today?” or “whose platform is this?”, which are the questions a busy client has at nine in the morning.
Think about who actually opens a sub-account. For many agencies it is not the business owner who bought the service, but a front-desk person, a coordinator or a salesperson. They log in to do work: reply to messages, check the schedule, move a deal. A grid of 30-day charts is a detour on the way to that work.
There is also the question of ownership. HighLevel’s white-label settings let you use your own domain, logo and mobile app. But once a client is inside, the Dashboard looks like every other HighLevel Dashboard, and widget themes only reach the cards themselves. Our guide to making GoHighLevel look like your own software walks through which parts of HighLevel’s own white-label settings cover the domain, logo and app, and which parts of the screen need a design.
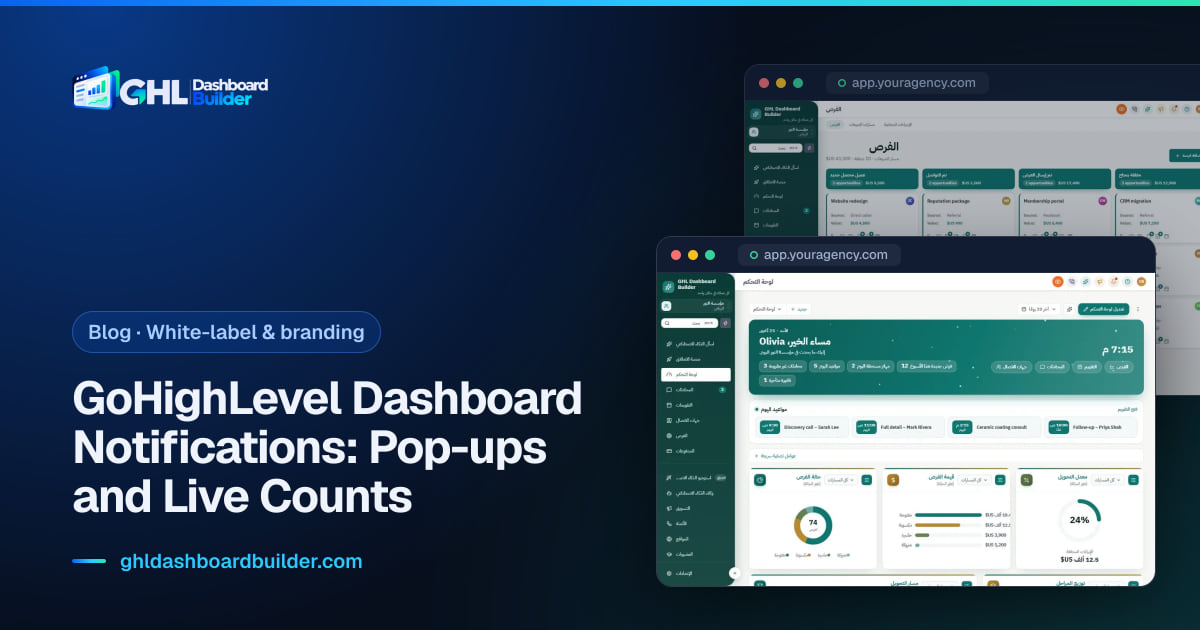
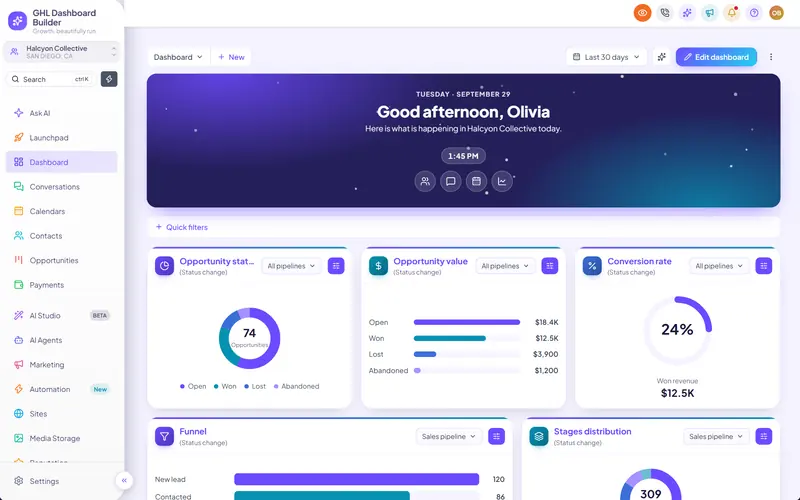
A welcome banner answers all three questions in one strip at the top of the screen. It greets the person by first name, shows the date and time, and puts the four or five pages they use most one click away, in your colors. It is the difference between opening a report and opening an app.
What the banner should not do is replace reporting. Owners still need the widgets, and you still need them for monthly reviews. The useful split is simple: the banner is the welcome layer, the widgets are the reporting layer, and both sit on the same page.
How does GHL Dashboard Builder add a welcome banner to HighLevel?
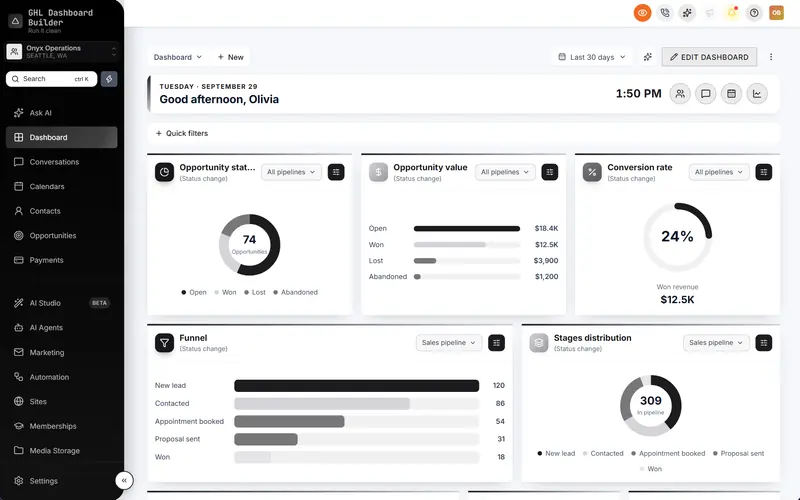
GHL Dashboard Builder adds the welcome banner as part of a design you install once in HighLevel’s Custom Code settings. The banner sits at the top of the Dashboard, above HighLevel’s own widgets, and shows a greeting with the user’s first name, the date, a clock and quick links, in your brand. The widgets underneath stay exactly as each sub-account set them up.
GHL Dashboard Builder is an independent design service that turns the standard HighLevel (GoHighLevel) dashboard into a branded platform: your colors, menu, login design, privacy mode and your clients’ language, installed with two lines of code. It is not affiliated with HighLevel. The design restyles HighLevel’s interface in the browser; HighLevel’s own white-label settings still handle the domain, the logo and the mobile app.
The welcome banner is one of 18 features. The ones that change the Dashboard work together, and the table shows what each one does for the people in your clients’ sub-accounts and which plan includes it. All plans are one-time payments, plus a one-time $100 setup fee for which we install and configure the design in your HighLevel.
| Feature | What it does for your agency’s clients | Plan |
|---|---|---|
| Welcome banner | A greeting with the user’s first name, the date, a clock and quick links, in 12 designs and 9 layouts, or on your own photo or colors | Starter and up |
| Live figures in the banner | Unread conversations, appointments today, tasks due, new opportunities and overdue invoices, each opening its page | Starter and up |
| Appointments board | The next 3 to 8 appointments from every calendar, in a card under the banner | Starter and up |
| Brand and colors | Your color system, fonts and favicon across HighLevel, so the banner matches the rest of the screen | Starter and up |
| Buttons, cards and forms | Your brand color on HighLevel’s buttons, tabs, tags and dropdowns | Starter and up |
| Live counts on the menu | The same live numbers as badges on the menu items | Pro and up |
| Languages and right-to-left | The menu and the banner’s words in your client’s language, among 15, with Arabic, Urdu and Hebrew right-to-left | Pro and up |
What a client sees after installation is HighLevel’s Dashboard with a branded strip on top. On a Monday morning the receptionist reads “Good morning, Maria”, the date and the time, a short line about the business, and a row of links to Conversations, Calendars, Contacts and the pipeline. Below that, the widgets their owner relies on are unchanged.
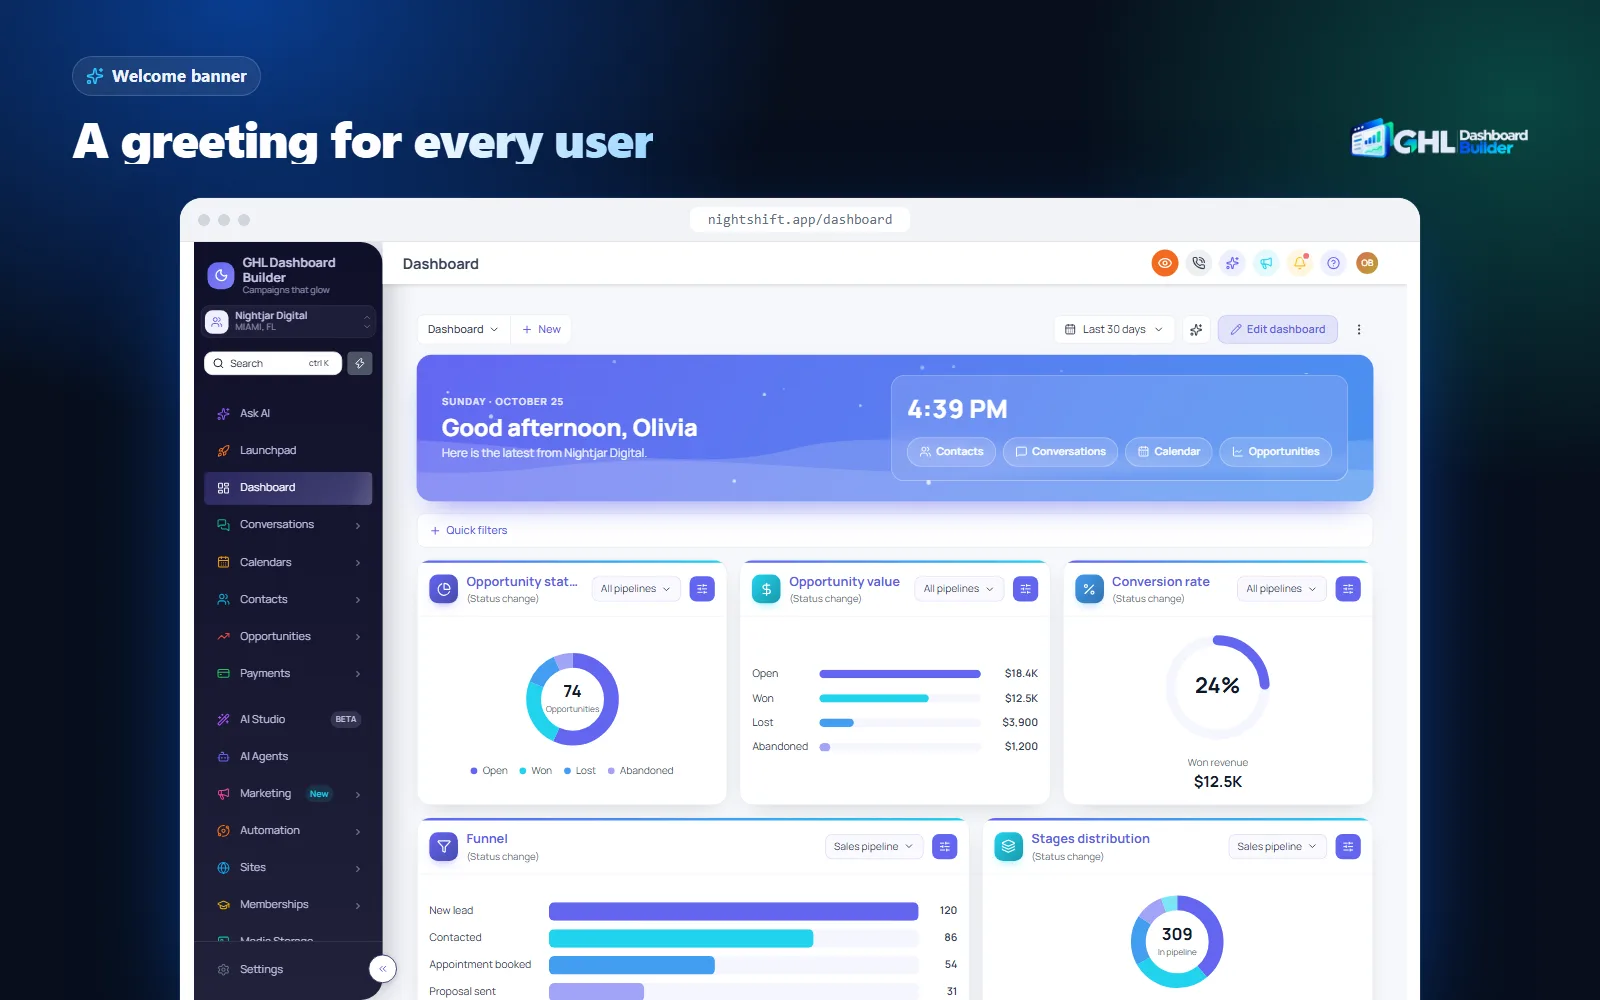
The banner uses the same color system as the rest of your design, so it does not look bolted on. If your brand is a deep navy with a coral accent, the sidebar, header, buttons and banner all use those colors. Our GoHighLevel dashboard customization guide shows how the banner fits with the rest of the Dashboard and the other areas you can restyle.
The banner is also safe to have on screen during a demo or a support call. It shows the signed-in user’s own first name and the business name, not client records, and the live figures are counts rather than names or messages. If you share a screen on calls, privacy mode blurs the client details on HighLevel’s other pages, as our guide to hiding client data in GoHighLevel explains.
Infographic
The welcome bannerby the numbers
12
banner designs, from brand gradients to a soft tint and a gradient frame
(GHL Dashboard Builder)
9
layouts: classic, centred, compact, split, spotlight, hero, tiles, dock and card
(GHL Dashboard Builder)
3
banner heights, from compact to tall
(GHL Dashboard Builder)
5
live figures it can show, each opening its page in HighLevel
(GHL Dashboard Builder)
Source: GHL Dashboard Builder welcome banner and live counts features, October 2026.
What can you change in the welcome banner?
Almost everything a client sees in it: the design behind the text, the layout of greeting, clock and links, the height, the wording, the quick links and whether live figures appear. You make these choices visually in the builder, on a copy of HighLevel’s Dashboard, and see each change before anything is installed.
The look: design, photo or your own colors
There are three ways to fill the background. You can pick one of 12 banner designs, which range from brand gradients to a soft tint and a gradient frame and take their colors from your brand. You can upload your own photo, with a darkening overlay so the text stays readable. Or you can use your own colors. A real-estate agency might use a photo of a skyline; a clinic might prefer a calm tint that does not compete with the widgets below.
The layout and the height
The 9 layouts decide where the greeting, the clock and the links sit: classic, centred, compact, split, spotlight, hero, tiles, dock and card. The three heights let the banner be a slim strip for teams who want the widgets high on the screen, or a taller hero for clients who care most about the first impression. Try two or three combinations in the builder on a laptop-sized preview before you decide, because the right choice depends on how much the client scrolls.
The words
The title and the message accept three placeholders. {greeting} becomes a time-of-day greeting such as “Good morning”, {name} becomes the signed-in user’s first name, and {business} becomes the business name. The default reads “{greeting}, {name}” with a line about what is happening in the business today, and you can rewrite both. Because every word is yours, the banner can speak the way your client’s industry speaks: “Today’s patients” for a clinic, “This week’s jobs” for a roofer.
The quick links
Quick links are your own: you choose which pages they open and whether they show as labels or as round icon buttons. A link can point to a page inside the sub-account, such as a specific pipeline or smart list, or to an outside page in a new tab, such as your support desk or a booking page for training calls. Links are the most practical part of the banner, so the next section covers which ones to choose.
| Choice | Options | Pick it when |
|---|---|---|
| Background | 12 designs, your photo, your colors | Designs for a quick on-brand result; a photo when the client has strong imagery |
| Layout | 9 layouts | Compact or dock for teams who want widgets high; hero or spotlight for first impressions |
| Height | Compact, regular, tall | Compact on small laptops; tall for owners who open the Dashboard to read it |
| Greeting | {greeting}, {name}, {business} | Keep the default, or match the client’s tone and industry words |
| Quick links | Your own pages, as labels or icons | Labels for new users; icons when the team knows the pages |
| Clock and date | On or off | On for front desks and shift teams; off for a calmer banner |
| Live figures | Up to 5 figures from the account | Teams that need to see what is waiting as soon as they log in |
Which quick links should a client’s welcome banner include?
Pick the three to five pages the client’s team opens most in their first ten minutes of work, and name them in the client’s words. For most service businesses that means the inbox, the calendar, the main pipeline and the contact list. Add one outside link only if it saves a real step, such as your support form.
Start by watching how the team actually uses HighLevel for one week. The pages they reach through two or three clicks every morning are the best candidates. A link to a page they open once a month is clutter, and too many links make the banner look like a second menu.
Industry wording matters here as much as on the menu. Our templates include industry looks with renamed menu items, such as Contacts to Patients for clinics, Opportunities to Jobs for home services, and Calendars to Bookings for spas. The banner’s quick links should use the same words, so a salon’s “Today’s bookings” link matches the “Bookings” item in its menu. Our guide to renaming GoHighLevel menu items explains how menu wording works.
| Client type | Suggested quick links | Live figures worth showing |
|---|---|---|
| Dental or medical practice | Patients, Conversations, Today’s appointments, Reviews | Appointments today, unread conversations |
| Med spa or salon | Bookings, Conversations, Clients, Gift cards or offers page | Appointments today, unread conversations |
| Roofing, HVAC or home services | Jobs pipeline, Conversations, Estimates calendar, Invoices | New opportunities, overdue invoices |
| Real estate team | Listings pipeline, Leads smart list, Conversations, Showings calendar | New opportunities, unread conversations |
| Gym or fitness studio | Members, Classes calendar, Conversations, Memberships | Appointments today, tasks due |
| Law firm or financial adviser | Matters pipeline, Clients, Consultations calendar, Tasks | Tasks due, appointments today |
Keep the links stable once a client learns them. People build habits fast, and a link that moves every month costs more than it helps. If you change them, tell the team, and change them in the builder rather than asking clients to work around the old ones.
The Serene template, built for spas and salons, is a good example of industry wording carried through the menu and the Dashboard. For a home-services client, our guide to GoHighLevel for home services shows which pages a busy office actually uses.
How do live figures turn the banner into a start screen?
Live figures put real numbers from the account inside the banner: unread conversations, appointments today, tasks due, new opportunities and overdue invoices. Each one is a link to its page. A user sees what is waiting the moment they log in, and reaches it in one click, instead of opening each page to check.
This is the main difference between the banner and HighLevel’s own widgets. Widgets usually report over a date range, such as leads this month or pipeline value this quarter, and they are excellent for that. Live figures answer a narrower question: what needs me right now? A clinic owner who opens HighLevel and reads “4 appointments today, 2 unread conversations” knows where to go first.
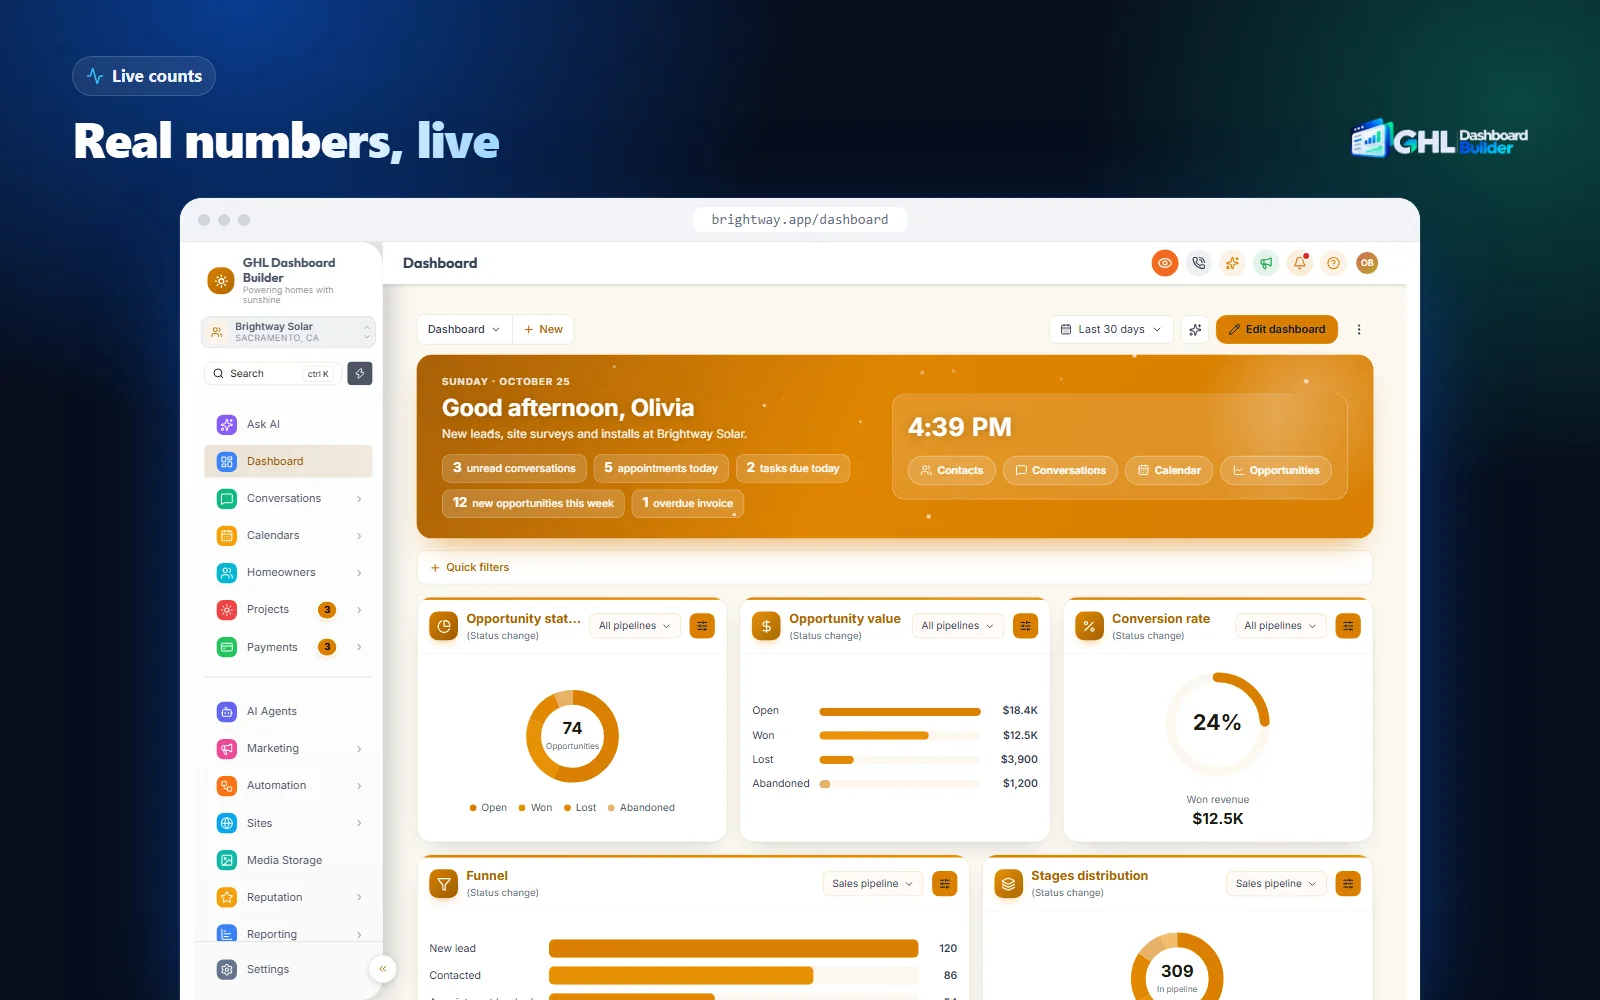
The figures read the sub-account the user is in, inside their own browser session, and refresh every minute while HighLevel is open. Nothing is copied to another service. They load after the page, so HighLevel’s widgets do not wait for them. You choose which of the five figures appear, and it is usually better to show two well-chosen numbers than all five.
Under the banner you can add the appointments board: a card listing the next 3 to 8 appointments from every calendar in the sub-account, each opening its calendar with a click. Together they make the top of the Dashboard a proper start screen: greeting, date and time, quick links, today’s numbers, then the next appointments, with HighLevel’s reports below.
Live figures in the banner and the appointments board come with every plan from Starter. On Pro, the same numbers can also appear as badges on the menu, such as unread conversations next to Conversations. Our guide to GoHighLevel dashboard notifications covers the badges, pop-ups and favourites in detail.
Before you plan a rollout, it helps to see the banner on a Dashboard in your own colors. The builder shows it on a live copy of HighLevel’s screens and never connects to your account.
How do you add a welcome banner to the GoHighLevel dashboard step by step?
Tidy the native widgets first, then design the banner, install it once at agency level, and test it with a real user. The native part happens in each sub-account’s Dashboard; the banner is installed in the agency’s Custom Code settings and appears on every sub-account it applies to.
Infographic
A branded welcome bannerin six steps
- 1
Tidy the widgets
Keep the reports the client reads and set the default dashboard.
- 2
Pick the links
List the pages the team opens every morning.
- 3
Design the banner
Choose design, layout, height and greeting in the builder.
- 4
Add live figures
Choose the numbers and the appointments board.
- 5
Install
Two lines in Custom Code, installed by us.
- 6
Test as a user
Log in as a team member and check every link.
Step 1: Tidy the native widgets
In the client’s sub-account, open Dashboard, choose Edit Dashboard, and remove widgets nobody reads. Keep the reports the owner reviews, put the most important ones at the top, and save. If the sub-account has several dashboards, open the three-dot menu on the one the team should land on and choose Set as default dashboard. Check under Manage Permissions that every team member has at least View access to it.
Step 2: List the quick links
Write down the three to five pages the team opens most, using the table in the previous section as a starting point. Copy the address of each page from the browser while you are in the sub-account, for example a specific pipeline or a smart list. Note the client’s own words for each one.
Step 3: Design the banner in the builder
Open the free builder, pick a template or start from your brand colors, and switch on the welcome banner. Choose a design, a photo or your own colors, then a layout and a height. Write the title and message with {greeting}, {name} and {business}, and add your quick links as labels or icons. Check the preview on desktop, tablet and phone.
Step 4: Add live figures and the appointments board
Choose which live figures the banner shows, and decide whether the appointments board sits under it and how many appointments it lists, from 3 to 8. The preview uses sample numbers, so you can judge the spacing before any real data appears.
Step 5: Install the design
After you choose a plan, we install the design in your HighLevel as part of the one-time $100 setup. The install is two lines: one in Custom CSS and one in Custom JavaScript, under Settings, then Company, then Whitelabel, then Custom Code. HighLevel’s agency company settings guide describes this Whitelabel area and its custom code fields. Later changes go live when you press Deploy to live, without pasting anything again.
Step 6: Test as a real user
Log in as a team member, not as an agency admin, and open the Dashboard. Check that the greeting shows the right first name, that every quick link opens the right page in that sub-account, and that the live figures match what you see in Conversations and Calendars. Then look at it on the smallest laptop the client’s team uses.
Native widgets or a welcome banner: which does what?
Use both, for different jobs. HighLevel’s widgets are the reporting layer: they measure leads, revenue, pipeline and ads over time, and each sub-account can arrange them freely. The welcome banner is the welcome layer: it greets the user, shows today’s numbers and sends them to the right page. Neither replaces the other.
| Question | HighLevel dashboard widgets | Welcome banner (GHL Dashboard Builder) |
|---|---|---|
| Main job | Reporting over a date range | Greeting, today’s numbers and quick links |
| Greets the user by first name | No | Yes, with {greeting} and {name} |
| Clock and date | No | Yes, each can be switched off |
| Quick links to chosen pages | No | Yes, as labels or icons |
| Your photo or brand design behind it | No; themes color the widget cards | Yes: 12 designs, your photo or your colors |
| Who sets it up | Users with Edit or Full dashboard access, per sub-account | The agency, once, for the sub-accounts it chooses |
| Changes per sub-account | Yes, every dashboard can differ | One design shows the same banner in all its sub-accounts |
| Works in HighLevel’s mobile app | HighLevel’s own app shows its own screens | No; web app in a browser only |
| Officially supported by HighLevel | Yes | No; installed through custom code |
| Cost | Included in HighLevel | One-time plan plus one-time $100 setup |
The split also helps with roles. Owners and managers tend to care about the widgets, because they want trends. Front-line staff tend to care about the banner, because they want to start work. When both are on the same page, each group sees what it needs without a separate dashboard for each role, although HighLevel’s permissions let you build one if a client wants it.
There is one trade-off to name clearly. Native widgets are part of HighLevel and keep working through every platform update. The banner is custom code, which HighLevel does not officially support, so a large HighLevel change can occasionally require a theme refresh. Our updates cover this, and the limits section below explains it in full.
How do you try the banner with one client first?
Limit the design to one sub-account. You still install one code at agency level, but you add the client’s sub-account by its link or Location ID, and only that sub-account gets the banner and the rest of the design. Every other client and the agency view keep their current look until you are ready.
A first-screen change is worth piloting because it changes habits. Pick a client whose team logs in every day and who will give you honest feedback. Set up the banner with three or four quick links and two live figures, and ask after a week which links they used, whether the greeting felt right, and whether the banner pushed the widgets they need too far down.
Use what you learn before rolling it out. You may find that a compact height suits teams on small laptops, that icons work better than labels once people know the pages, or that one live figure is never looked at. Each of these is a setting in the design, and changes reach HighLevel with Deploy to live.
Once the pilot works, add more sub-accounts to the same design or switch it to the whole agency. One design shows the same banner in every sub-account it covers. If different clients need different banners at the same time, such as a clinic and a roofer with different links and photos, you need separate designs: Pro includes up to 3 and Agency up to 100. Our guide to GoHighLevel sub-account branding covers per-client designs in depth, and for an unusual set-up, talk to us before you buy.
What are the limits of a custom welcome banner?
The banner runs in the HighLevel web app in a browser, through custom code that HighLevel does not officially support. It does not appear in the mobile app, it shows one design per set of sub-accounts, and it does not change HighLevel’s own widgets. Knowing these limits up front lets you set the right expectations with clients.
- Custom code is unsupported by HighLevel. HighLevel’s agency company settings guide describes custom JavaScript and CSS as powerful but unsupported, and warns that changes to HighLevel’s interface can break it. Starter and Pro include 12 months of updates that keep the theme working through such changes, then optional at $99 a year; Agency includes lifetime updates.
- Browser only. The banner, live figures and appointments board appear in the web app in a browser, including a phone’s browser. HighLevel’s mobile apps do not load agency custom code, so app users see HighLevel’s own Dashboard.
- It sits above the widgets, not inside them. The banner does not edit, hide or restyle individual reports. Widget colors still come from HighLevel’s own dashboard and widget themes, which you set in edit mode.
- One design, one banner. Every sub-account that uses a design sees the same banner, links and photo. The name in the greeting changes per user, but the links do not change per client.
- The language covers the design, not all of HighLevel. The banner’s words follow the design’s language; with Pro you can translate the menu and navigation into 15 languages, with right-to-left for Arabic, Urdu and Hebrew. HighLevel’s own pages, widgets, system emails and the mobile app follow HighLevel’s language settings. Our languages page lists what is translated.
- Live figures refresh every minute, not instantly. For time-critical alerts, keep HighLevel’s own notifications and workflow alerts in place.
- Height is a trade-off. A tall banner pushes the widgets down. On small laptops, a compact banner with live figures often serves teams better than a large photo.
There is also a practical limit on how much to put in. A banner with six links, five figures, a clock, a date and a long message stops being a welcome and becomes noise. A good banner is short: a greeting, three or four links, two numbers.
If a design ever misbehaves after a HighLevel update, the fix is a theme refresh on our side, not a change in the client’s account. Removing the design entirely takes seconds: clear the two Custom Code fields and HighLevel returns to its standard look. Our FAQ answers the common questions about safety, speed and data.
What does a branded welcome banner cost?
The welcome banner comes with every plan, and every plan is a one-time payment with no monthly fee. Starter costs $280, Pro $480 and Agency $880, plus a one-time $100 setup fee on every plan, for which we install and configure the design in your HighLevel. Starter already includes the banner, live figures and the appointments board.
Source: GHL Dashboard Builder pricing, October 2026 (plan price plus the one-time $100 setup fee)
| Plan | One-time price | Setup fee (one-time) | Dashboard features | Designs | Updates |
|---|---|---|---|---|---|
| Starter | $280 | Starter | $280 | 00 | |
| Pro | $480 | Pro | $480 | 00 | |
| Agency | $880 | Agency | $880 | 00 |
Each design can cover the whole agency or only the sub-accounts you choose. You can upgrade later by paying the difference between plans, and the setup fee is never charged twice. The pricing page lists the full plan contents.
How you charge your clients is up to you. Some agencies include the branded Dashboard in every plan as part of their brand; others make it part of a premium tier. You set the price and keep what you charge, with no per-client fee from us. If you are weighing this against hiring a developer to write the code yourself, our guide to HighLevel custom CSS explains what that route involves and what it takes to maintain.
What to do next
- Open one client’s Dashboard as a team member would. Ask yourself what that person needs in their first minute, and whether the current widgets give it to them.
- Tidy the native widgets. In edit mode, remove reports nobody reads, set the default dashboard and check that every team member has at least View access.
- Write down the quick links. List the three to five pages the team opens most, in the client’s own words.
- Try the banner in your brand in the free builder: a design, a layout, your greeting and live figures on a copy of HighLevel’s Dashboard.
- Pilot with one client. Limit the design to their sub-account, ask after a week what they used, and adjust before rolling it out to everyone.