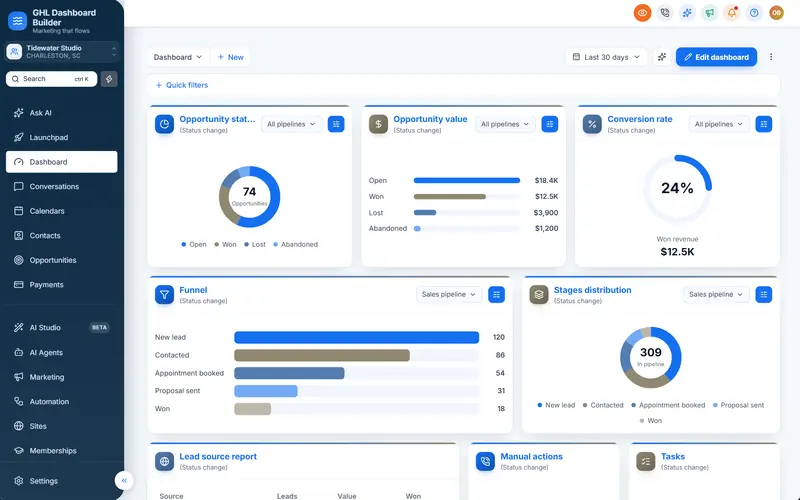
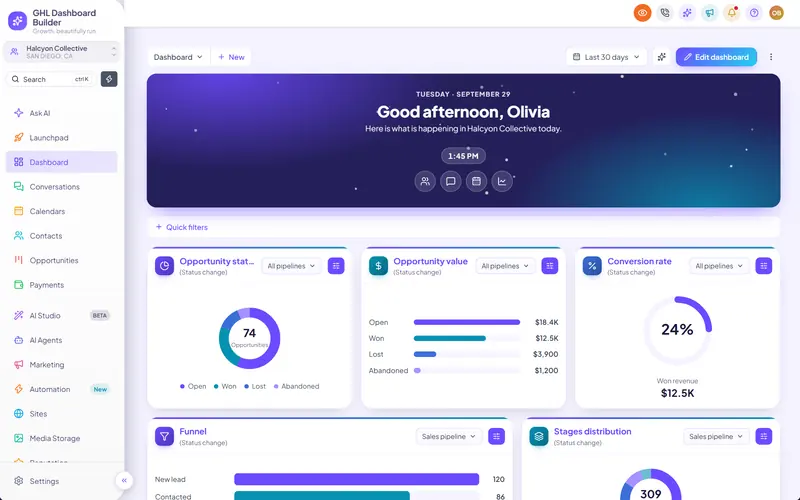
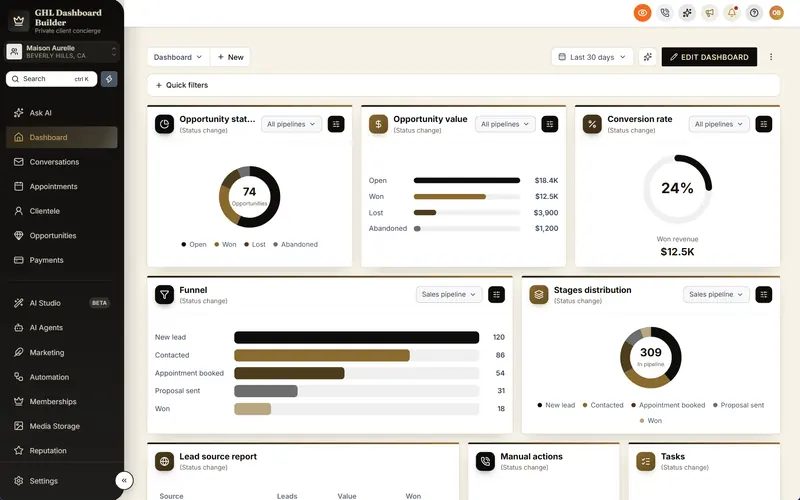
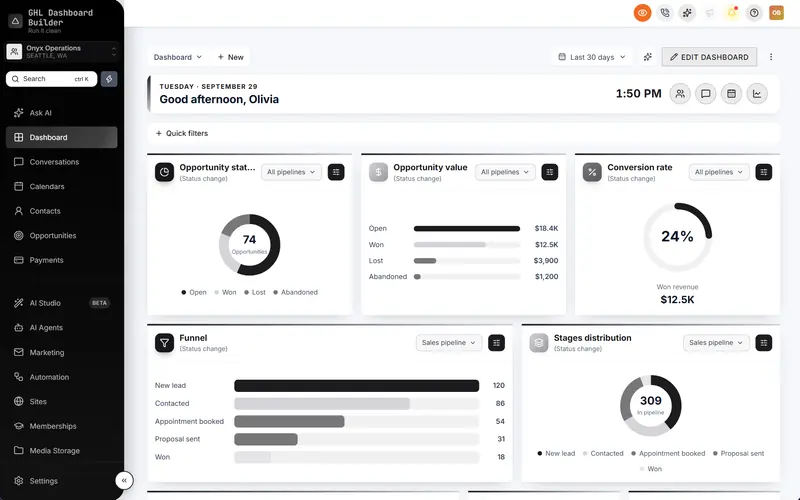
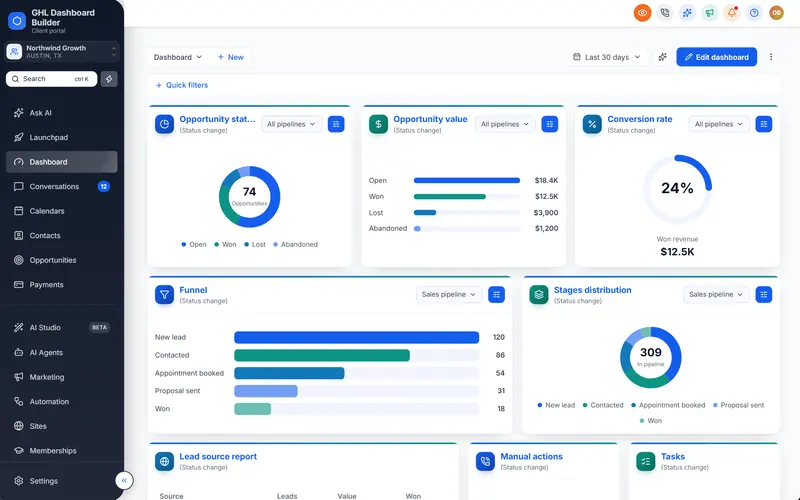
You found a theme you like, or a developer sent you a stylesheet, and now you need to put it into HighLevel without breaking anything your clients use every day. The questions come quickly. Which box does it go in? Will every sub-account change at once? What happens if a client logs in while it looks wrong? And if it does go wrong, how do you get back to how things were in under a minute?
This guide answers those questions for HighLevel (also called GoHighLevel or GHL). It shows where to add GoHighLevel custom CSS and JavaScript, how the two common install methods compare, how to install a theme step by step with HighLevel’s menu paths, how to test it on one sub-account first, and four ways to roll it back or remove it. It also covers why a change sometimes does not show, and what a theme install cannot change. GHL Dashboard Builder is an independent design service and is not affiliated with HighLevel; where our product helps, we say exactly what it does and which plan includes it.
Where do you add custom CSS in GoHighLevel?
Dashboard-wide custom CSS goes in the agency view under Settings, Company, Whitelabel, Custom Code, in the field called Custom CSS. Custom JavaScript goes in the field next to it. Code there styles the HighLevel app for every sub-account. Funnels, websites, forms and community groups have their own CSS fields, which only style those pages.
HighLevel’s agency company settings article places the custom code fields in the Whitelabel section of the agency’s company settings, alongside the logo, white-label domain and legal links, and describes custom CSS and JavaScript as powerful but unsupported. In some accounts the tab is labelled White Label rather than Whitelabel. The path at the time of writing:
- Switch to the agency view (the account switcher at the top of the sidebar).
- Open Settings, then Company.
- Open the Whitelabel tab.
- Scroll down to Custom Code. You will see Custom CSS and Custom JavaScript.
The most common install mistake is pasting dashboard CSS somewhere else. Here is where each kind of custom code lives, so you can rule that out.
| Where the field is | What it styles | Who sees the result |
|---|---|---|
| Agency view: Settings, Company, Whitelabel, Custom Code | The HighLevel app: sidebar, header, every page in every sub-account | You, your team and your clients’ users |
| A funnel or website: its Settings, Custom CSS | That site’s published pages | Visitors to the site |
| A form, survey or quiz: Styles, Advanced, Custom CSS | Fields and buttons inside that form | People filling in the form |
| A community group: Settings, Branding, Advanced Options | One community group | Members of that group |
Forms are the case that trips people up most. HighLevel’s guide to custom CSS for forms, surveys and quizzes explains that an embedded form loads inside an iframe, so CSS on the surrounding page cannot reach its fields. The same principle applies the other way: CSS in the agency Custom Code box never changes a funnel page or a form.
The rest of this guide is about the first row, because that is where a dashboard theme is installed and where a mistake reaches every client. If you want the wider picture of what CSS can change in the dashboard and how to write selectors that last, our complete guide to HighLevel custom CSS covers that in depth.
What happens when you save code in HighLevel’s Custom Code boxes?
Saved agency-level code loads for every user, in every sub-account, from the next page load. There is no draft, preview or staging step in that box. A rule that hides the wrong element, or a script with an error, affects all your clients until you change it, which is why the backup step before an install matters so much.
Three facts shape how you should install anything there.
It is global. The agency Custom Code fields load for your team and for your clients’ users in every sub-account. HighLevel has no built-in option in that box to apply code to one sub-account only. If you want a look for one client, the code itself has to detect which sub-account is open (we come back to this below).
It is unsupported. HighLevel describes custom code as unsupported, and its article on custom CSS and JavaScript for community groups states plainly that HighLevel does not provide guidance or support for writing, debugging or maintaining custom code. HighLevel also changes its interface regularly, and a change to the elements your CSS targets can stop a rule working. That is not a reason to avoid custom code; it is a reason to keep it maintainable and easy to roll back.
It can affect loading. HighLevel’s help article on CRM loading states and the impact of custom CSS and JS notes that custom code which conflicts with the app’s loader can stop it showing its normal states, and suggests testing in a private (incognito) window, then clearing site data and hard-refreshing, when pages seem stuck. Keep that article in mind for the troubleshooting section later.
It is worth noticing how HighLevel handles the same risk in community groups. There, custom CSS and JavaScript have a Test Preview button and a Live Mode switch, and adding customCode=false to a community’s address loads it without custom code for your session. The agency Custom Code box has none of that, so you have to build the same safety yourself: a backup, a test account and a quick way back.
Pasted stylesheet or hosted install lines: which install method is safer?
There are two ways to put a theme into HighLevel. You can paste the whole stylesheet and script into the two boxes, or paste two short lines that load the theme from a server. Pasted code is simple and fully visible; hosted lines make later changes and rollbacks faster, because you never edit HighLevel again after the first install.
A pasted stylesheet is what most free themes and many freelancers deliver: hundreds or thousands of lines of CSS, and sometimes a long script, pasted straight into Custom CSS and Custom JavaScript. Everything is in HighLevel, which you can read at any time. The downside is that every change, however small, means opening the box, finding the right rule, editing it in a field that is not built for editing code, and saving it live for every client at once.
Hosted install lines are one short line in Custom CSS that loads a stylesheet, and one short line in Custom JavaScript that loads a script. The theme itself lives on the provider’s server. You paste the lines once. When the theme changes, the same lines load the new version, so you never edit HighLevel again unless you want to remove the theme.
| Question | Pasted stylesheet | Hosted install lines |
|---|---|---|
| What goes into HighLevel | The full CSS and JavaScript | One CSS line and one JavaScript line |
| Can you read the code in HighLevel? | Yes, all of it | You see the two lines; the code is on the provider’s server |
| Changing the theme later | Edit the code in the box and save | Change the design, publish it; the same lines load it |
| Rolling back | Paste your saved copy of the old code | Paste the old code back, publish the previous design, or switch the theme off at the provider |
| Removing it | Clear both boxes | Clear both boxes |
| Depends on an outside server? | No | Yes, the provider’s server must be reachable |
| Risk of a half-pasted or truncated edit | Higher, especially for long scripts | Low, the lines are short |
Neither method is wrong. A pasted stylesheet suits an agency with a developer who keeps the code in version control and pastes tested releases. Hosted lines suit agencies that want to change colors, menu wording or banners without touching code, and want a theme switch that does not require logging in to HighLevel’s settings. Either way, the cascade rule applies: when two CSS rules are equally specific, the one that appears later wins, as web.dev’s lesson on the CSS cascade explains. So if you keep extra rules alongside a theme, put them after the theme, or they may be overridden.
How does GHL Dashboard Builder install a GoHighLevel theme?
GHL Dashboard Builder is an independent design service that turns the standard HighLevel (GoHighLevel) dashboard into a branded platform: your colors, menu, login design, privacy mode and your clients’ language, installed with two lines of code. On every plan, the install is one CSS line and one JavaScript line in Custom Code, and we install and check it for you as part of the one-time setup fee.
The two lines load the version of your design that was last deployed, not the version you are editing. That is the part that makes installs and rollbacks calm. You can change the design, preview it, and ask a colleague to review it, while your clients keep seeing the current live version. When you are ready, you press Deploy to live. HighLevel shows the new version within a minute or two; refresh it then. Nothing is pasted into HighLevel again.
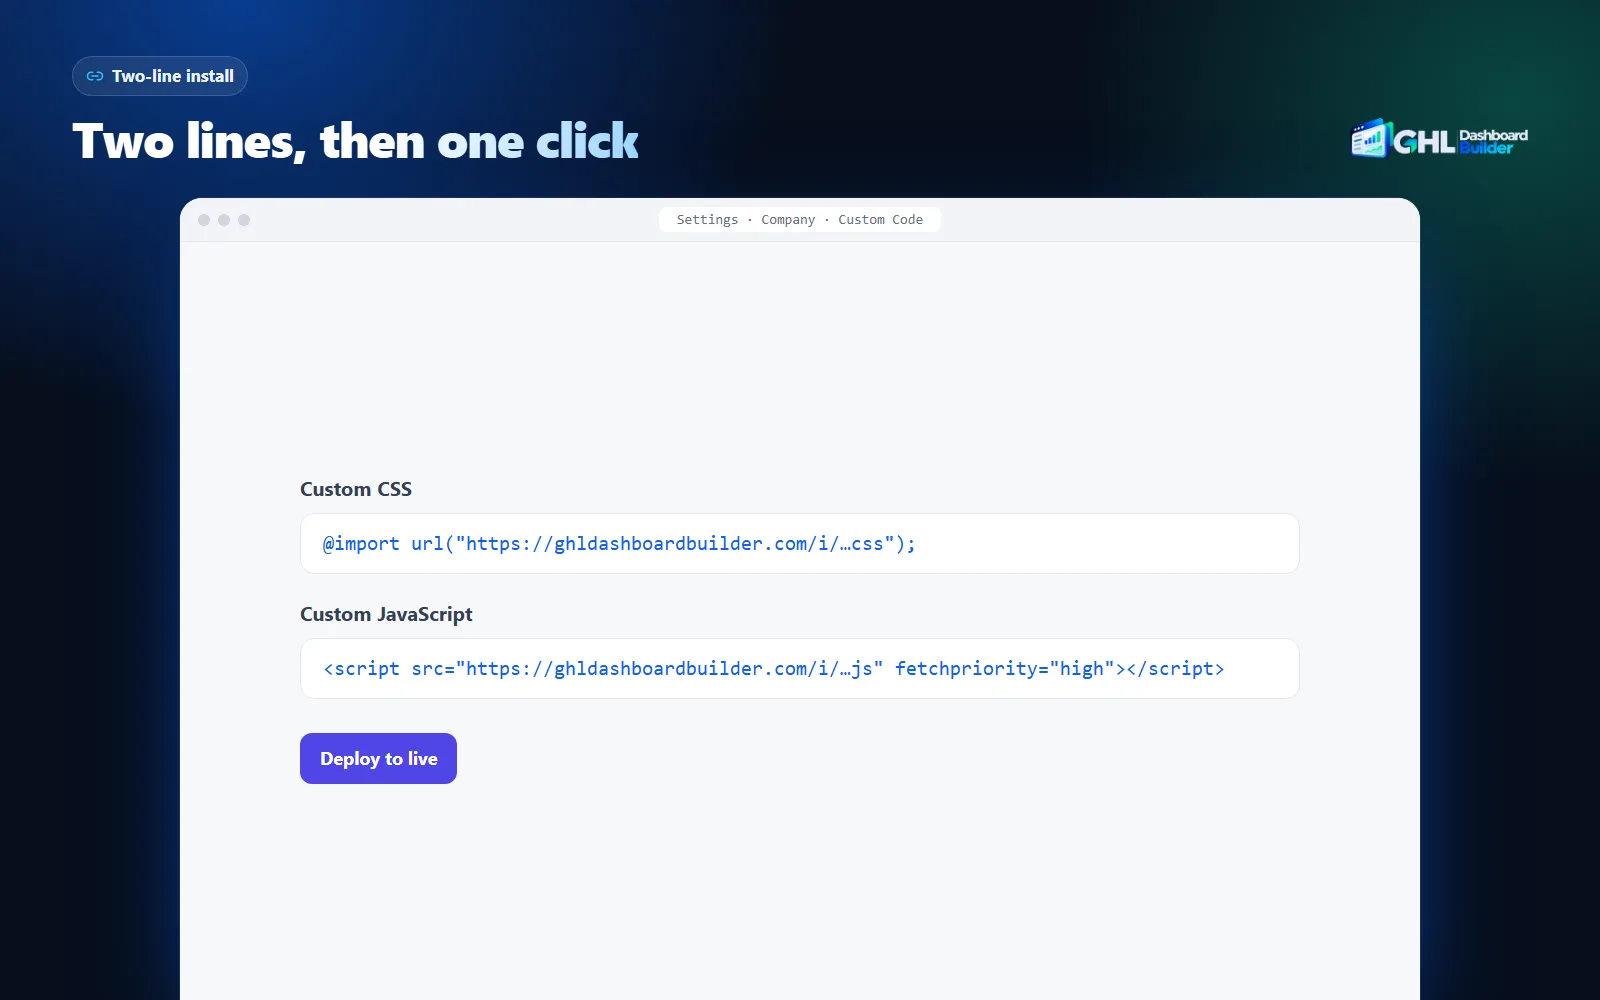
Here is what the install side of the product does, and which plan includes it.
| Feature | What it does for your agency and clients | Plan |
|---|---|---|
| Two-line install | One CSS line and one JavaScript line in Custom Code, pasted once | Starter and up |
| Deploy to live | Edits stay private until you deploy; then the same two lines load the new version | Starter and up |
| Turn theme off and on | Keeps the two lines in HighLevel but loads nothing, so the account looks like plain HighLevel, until you turn it on again | Starter and up |
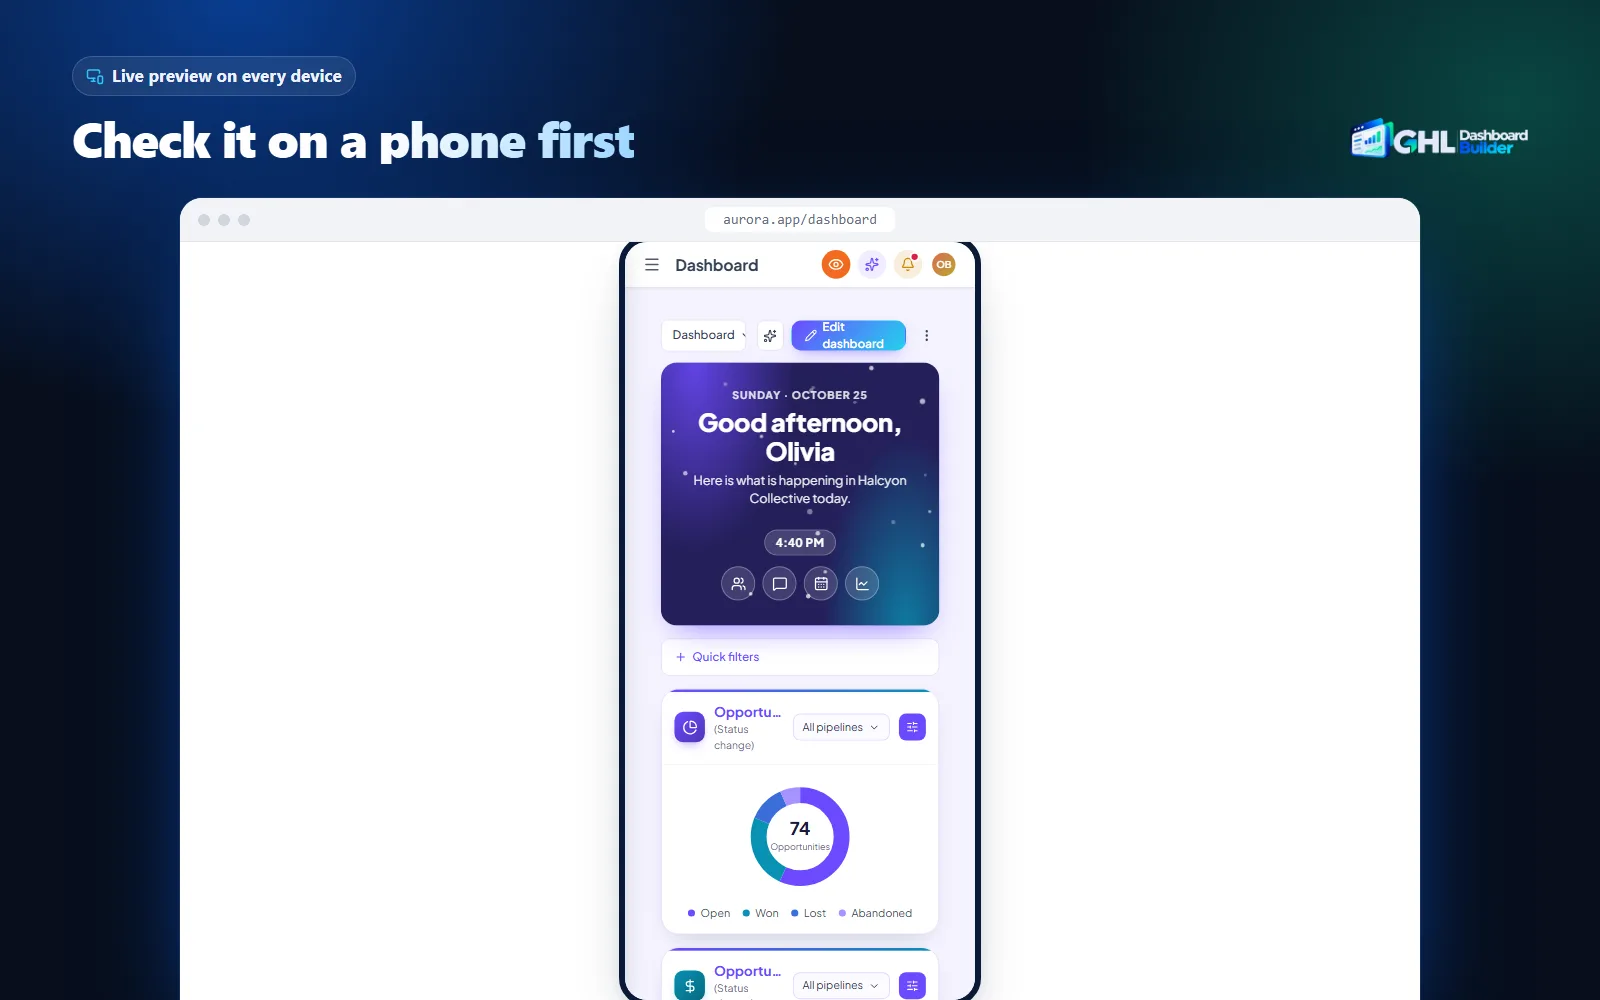
| Live preview on every device | Your design on a live copy of HighLevel’s screens on desktop, tablet and phone, before anything is installed | Starter and up |
| Whole agency or chosen sub-accounts | Each design applies to the whole agency or only to sub-accounts you add by link or Location ID | Starter and up (1 design); Pro up to 3; Agency up to 100 |
| Installation and checking | We install the design in your HighLevel, configure it and check every screen | All plans, one-time $100 setup fee |
| Full CSS and JavaScript files | Download the complete files instead of the hosted lines, and add your own CSS and JavaScript on top | Agency |
| Export and import design files | Save a design as a file and bring it back later | Agency |
The theme loads as one stylesheet and one script, about 60 KB compressed, and the browser caches it after the first visit. It only changes how HighLevel looks and what its menu says, plus the features you switch on, such as the welcome banner or privacy mode; it does not read or send your data. The full list of 18 features is on the features page, and the two-line install page shows the install screen itself.
Infographic
Installing a themeby the numbers
2
lines to paste into HighLevel: one CSS, one JavaScript
(GHL Dashboard Builder)
5 min
about how long the install takes in Custom Code
(GHL Dashboard Builder)
60 KB
about the theme's compressed size, cached after the first visit
(GHL Dashboard Builder)
$100
one-time setup fee: we install it, configure it and check every screen
(GHL Dashboard Builder pricing)
Source: GHL Dashboard Builder product documentation and pricing page, November 2026.

The install on our side follows the same routine described in the step-by-step section below: back up what is already in the boxes, paste the two lines, save, hard-refresh and walk through the screens. If the theme does not apply correctly on your account, we fix it at no extra cost. To remove it, you clear the two boxes; there is nothing else to uninstall.
One honest trade-off: our install instructions tell you to replace whatever is in Custom CSS and Custom JavaScript with the two lines. If your Custom JavaScript box already holds other scripts, such as an analytics tag or a chat widget, save a copy and mention it before the install so we can plan for it. On the Agency plan you can add your own CSS and JavaScript on top of the generated theme.
What should you prepare before installing a GoHighLevel theme?
Prepare four things before you open Custom Code: a dated copy of the code already in both boxes, a test sub-account, a non-admin test user, and a quiet time to install. Ten minutes of preparation turns a broken install into a one-minute rollback instead of an evening of guesswork while clients send screenshots.
Use this checklist. Every row exists because skipping it causes a recognizable problem later.
| Prepare | Why it matters | How to do it |
|---|---|---|
| A copy of the current code | It is your rollback; without it, “go back” means rebuilding from memory | Copy both boxes into a text file named with today’s date |
| A list of other scripts in the boxes | Analytics, chat widgets or tracking tags can be lost when you replace the contents | Read the Custom JavaScript box line by line and note what each script is for |
| A test sub-account | You need somewhere to look that is not a paying client’s busiest account | Use an internal or demo sub-account with some sample contacts and a pipeline |
| A non-admin test user | Menus and pages differ by role; admins see more than clients | Create or reuse a user with the same role your clients have |
| A preview of the look | You should approve the design before it is live, not after | Check the design on desktop, tablet and phone in a preview first |
| A quiet install time | If something goes wrong, fewer clients see it | Install outside your clients’ busiest hours, and not before a holiday |
| A way to tell clients | A changed menu surprises people | Send a short note: what changes, when, and who to contact |
The backup row deserves emphasis. If the boxes are empty today, write that down too (“both boxes empty on 3 November”); knowing that the original state was empty is itself a rollback plan. If they hold code from a previous theme or developer, keep that file somewhere you will find it in six months, not on one person’s desktop.
The preview row is where most agencies save time. Our free builder shows your colors, logo, menu wording and language on a live copy of HighLevel’s screens, and never connects to your HighLevel account, so you can try several looks before anything touches a client.
If you have not settled on a look yet, starting from a finished template is faster and less risky than starting blank, because the template has already been checked on HighLevel’s screens. The templates gallery has 27 designs, from dark technical looks to light, calm ones and industry versions with the menu wording already set. A familiar design such as the Atlas template, which keeps HighLevel’s blue and adds a warm sand accent on a slate sidebar, is a sensible first install for an agency that wants clients to notice the brand without having to relearn the screens.
How do you install a GoHighLevel theme step by step?
Back up the existing code, paste the CSS into Custom CSS and the JavaScript into Custom JavaScript, save, then hard-refresh and check the screens your clients use most as a non-admin user. The whole routine takes about ten minutes; pasting is the shortest part of it.
Infographic
Installing a GoHighLevel themein six steps
- 1
Back up first
Copy both Custom Code boxes into a dated file.
- 2
Open Custom Code
Agency view, Settings, Company, Whitelabel, Custom Code.
- 3
Paste the code
CSS into Custom CSS, JavaScript into Custom JavaScript.
- 4
Save and refresh
Save, then hard-refresh with Ctrl+Shift+R or Cmd+Shift+R.
- 5
Check as a client
Walk the main screens as a non-admin user.
- 6
Check on a phone
Open the web app in a phone browser and on a tablet.

Menu paths below are as HighLevel’s help center describes them at the time of writing. HighLevel moves settings from time to time, so if a label differs in your account, search the help center for “agency company settings”.
1. Back up what is already there
- Switch to the agency view and open Settings, Company, Whitelabel.
- Scroll to Custom Code.
- Select everything in Custom CSS, copy it and paste it into a text file.
- Do the same for Custom JavaScript, in the same file under a clear heading.
- Save the file with today’s date in its name, somewhere your team can find it.
2. Paste the new code
- Paste the new CSS into Custom CSS. With hosted install lines, replace the contents with the CSS line. With a pasted stylesheet, replace the old theme’s code, and keep any rules you deliberately want to add at the end.
- Paste the new JavaScript into Custom JavaScript, in the same way. If other scripts you want to keep are in the box, make sure they are still there and complete.
- Read both boxes once more. A missing closing brace in CSS, or a cut-off line in a script, is easy to spot now and hard to find later.
- Save. HighLevel may show a warning about adding third-party scripts; read it and continue only if you trust the code.
3. Refresh and check
- Open a sub-account in a new tab and hard-refresh: Ctrl+Shift+R on Windows and Linux, Cmd+Shift+R on a Mac. A normal refresh can show the old, cached theme.
- Walk the screens your clients use every day: Dashboard, Conversations, Calendars, Contacts, Opportunities, Payments and Settings.
- Open dropdowns, modals, date pickers and the search box. Text that is unreadable on a new background usually hides in pop-ups.
- Log in as your non-admin test user and repeat the walk. Some menus and pages differ by role.
- Narrow the browser window to tablet width, then open the web app in a phone browser.
- Keep the backup file until the theme has run for at least a week without complaints.
If something looks wrong in step 3, do not start debugging live code while clients are logged in. Roll back first (the next sections show how), then fix the problem calmly in a preview or on a test account. Our guide to why GoHighLevel custom CSS stops working walks through finding the cause once the pressure is off.
How do you test a theme on one sub-account before everyone sees it?
Because HighLevel’s Custom Code box applies to every sub-account, a test on one account needs code that checks which sub-account is open. With GHL Dashboard Builder, limit the design to chosen sub-accounts by pasting a sub-account’s link or Location ID; only that account changes, and everyone else keeps their current look.
The pattern is simple and worth using for every significant change, not only the first install:
- Set the design’s scope to only these sub-accounts and add your test sub-account, by its link or its Location ID.
- Install the two lines (or, if they are already installed, deploy the change).
- Check the test sub-account as an admin and as a non-admin user, on desktop and on a phone.
- Add one friendly client, if you want a real user’s opinion, and give them a few days.
- Switch the scope to the whole agency and deploy again.
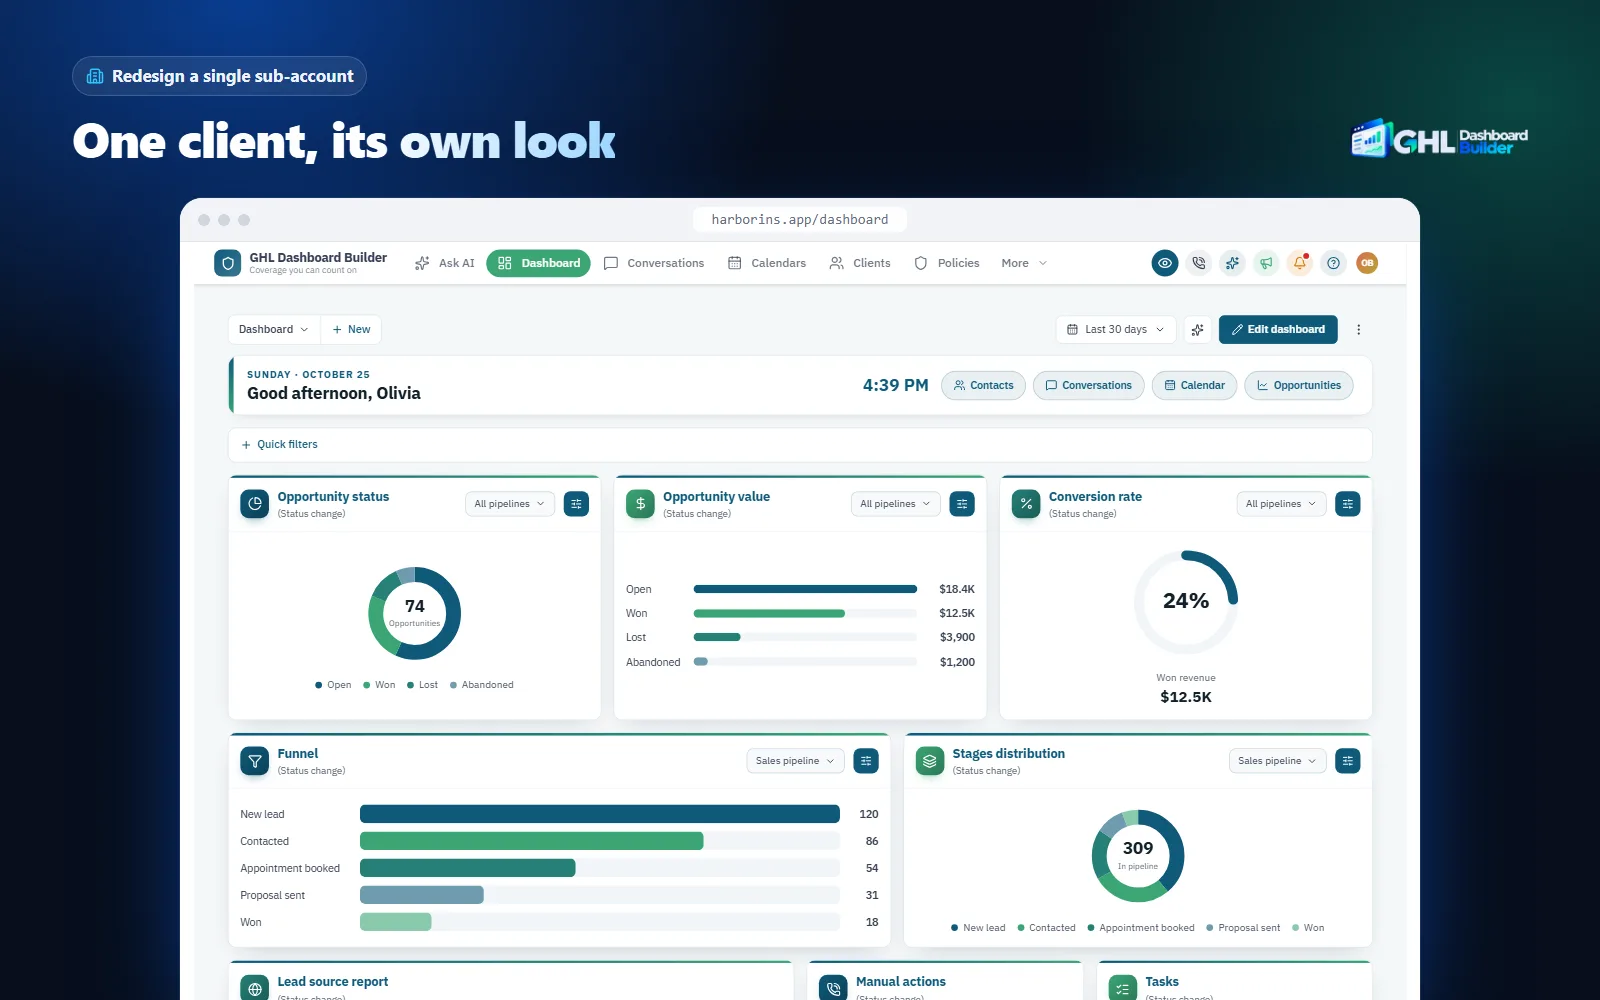
The Location ID is the sub-account’s identifier in HighLevel. You will find it in your browser’s address bar when the sub-account is open, right after /location/. Pasting the whole link works too; the builder reads the ID from it. Our guide to GHL sub-account branding covers finding the Location ID and the edge cases in detail.
One mistake to avoid: if a design is set to chosen sub-accounts but none are listed, HighLevel looks unchanged everywhere, which can look like a failed install. Our install screen warns about this, but it is worth knowing if you see no change at all. And one limit to know: one design is shown in each sub-account. Starter includes 1 design, Pro up to 3 and Agency up to 100, each for the whole agency or for chosen sub-accounts. If you want a different look for many clients, talk to us about the setup first.
How do you roll back a GoHighLevel theme?
Roll back by putting HighLevel back in the state you saved before the install: paste the backed-up code into both boxes and save, or clear both boxes for the standard look. With hosted install lines you have two faster options that never open HighLevel’s settings: switch the theme off, or revert the design and deploy again.
Which one to use depends on what went wrong and how quickly you need it gone. Here are the four options side by side.
| Rollback option | When to use it | What clients see afterwards | Touches HighLevel’s settings? |
|---|---|---|---|
| Turn the theme off (hosted lines) | Something is badly wrong and you need it gone now | Plain HighLevel, until you turn it on again | No |
| Revert the design and deploy (hosted lines) | One setting is wrong, such as a color or a menu label | The design with that setting fixed | No |
| Restore your saved copy | You want the exact previous theme or code back | The previous look | Yes, two pastes |
| Clear both boxes | You want no custom code at all | Plain HighLevel | Yes |
The chart counts the steps in each procedure as written below, so you can see which is fastest under pressure.
Source: Step counts from the rollback procedures in this guide.
Turn the theme off
This is the emergency switch. The two lines stay in HighLevel, but they load nothing, so every sub-account looks like plain HighLevel.
- Sign in to your GHL Dashboard Builder account and open Install links on the design.
- Press Turn theme off.
- Hard-refresh HighLevel and confirm the standard look is back.
When the design is fixed, press Turn theme on. You never had to open HighLevel’s settings. The same panel has Replace links, for the rare case where your install lines were shared somewhere they should not be.
Revert the design and deploy
Use this when one setting is wrong and the rest of the theme is fine: a color with poor contrast, a renamed menu item a client dislikes, a banner link that points to the wrong page.
- Open the design in the editor and change the setting back. Undo (Ctrl+Z, or Cmd+Z on a Mac) steps back through recent edits.
- Check the result in the preview.
- Press Deploy to live.
- After a minute or two, hard-refresh HighLevel and check.
Because edits stay private until you deploy, you can take your time over the fix. On the Agency plan, export the design file before a big change; importing it later brings the whole previous design back.
Restore your saved copy
This is the classic rollback, and it works for any theme from any source, as long as you made the backup.
- Open your dated backup file.
- In the agency view, go to Settings, Company, Whitelabel, Custom Code.
- Replace everything in Custom CSS with the CSS from the backup.
- Replace everything in Custom JavaScript with the JavaScript from the backup.
- Save.
- Hard-refresh a sub-account and check the screens you changed.
Clear both boxes
- In the agency view, go to Settings, Company, Whitelabel, Custom Code.
- Copy both boxes into a dated file, even now: you may want this version again.
- Delete everything in Custom CSS and Custom JavaScript.
- Save.
- Hard-refresh a sub-account and confirm the standard look is back.
Whatever method you use, tell the clients who reported the problem that it is fixed, and note what happened in the same place as your backup files. The next install will be faster for it.
How do you remove a theme from GoHighLevel completely?
Clear both Custom Code boxes in the agency view, save and hard-refresh. That removes the theme for every user at once. A theme only changes how the interface looks and what the menu says, so contacts, conversations, pipelines, automations and settings are untouched, before and after.
There is nothing else to uninstall. A dashboard theme installed through Custom Code does not add apps, users, workflows or fields to your account. What stays after removal is everything HighLevel’s own white-label settings control: your white-label domain, logo, favicon and legal links remain as you set them, because those are separate settings in the same Whitelabel tab, not part of the theme. Our guide to agency versus sub-account settings in GoHighLevel explains which branding settings live where, if you are not sure what a removal will leave in place.
A few things to check after a full removal:
- Other scripts. If the Custom JavaScript box also held analytics or a chat widget, clearing the box removed those too. Paste back the scripts you want to keep from your backup.
- Client expectations. If clients were used to renamed menu items, such as Patients instead of Contacts, the standard labels will come back. Tell them before you remove the theme, not after.
- Help material. Videos and help articles you made with the theme will no longer match what clients see.
- Your provider’s account. With hosted lines, clearing the boxes stops the theme loading even though your design still exists in your GHL Dashboard Builder account. You can install it again later by pasting the same two lines.
If you are removing a theme because it broke after a HighLevel update, consider whether a refresh of the theme is the better fix. Our plans include 12 months of updates that keep a theme working through HighLevel’s changes (lifetime on Agency), then optional updates at $99 a year.
Why doesn’t my change show after I install or deploy?
Usually because the browser is still showing a cached version, the code is in the wrong box, a syntax error stops the rest of the stylesheet, or the design is limited to sub-accounts that do not include the one you opened. Hard-refresh first, then test in a private window; most cases end there.
Work through the causes in this order, from most to least common.
| What you see | Likely cause | What to do |
|---|---|---|
| Nothing changed at all | Browser cache | Hard-refresh with Ctrl+Shift+R or Cmd+Shift+R, or open a private window |
| Nothing changed in one sub-account | The design is limited to other sub-accounts | Check the design’s scope and add that sub-account, then deploy |
| Nothing changed anywhere, design limited to sub-accounts | No sub-accounts listed in the scope | Add a sub-account or choose the whole agency, then deploy |
| Change shows for you but not for a client | The client’s browser has the old version cached | Ask them to hard-refresh, or wait for the cache to expire |
| Deployed a minute ago, still the old look | The new version has not reached HighLevel yet | Wait a minute or two, then hard-refresh |
| Half the theme works | A syntax error, such as a missing brace, stops later rules | Check the code where the working part ends |
| Some rules ignored | HighLevel’s own rules are more specific, or come later | Make the selector more specific, or place your rule after the theme |
| Pages stall or keep loading | Custom code conflicting with HighLevel’s loader | Test in a private window; if that loads, roll back and fix the code |
| Funnel or form unchanged | Agency CSS does not style funnels or forms | Use the funnel’s or form’s own CSS field |
The last two rows come straight from HighLevel’s own help center. The loading-states article recommends a private window first, then clearing site data and cookies and hard-refreshing, and it names custom CSS and JavaScript as a possible cause of loader problems. If the private window loads normally, the cause is likely in the cache or in custom code, and a rollback will confirm which.
For the “some rules ignored” row, remember the cascade: between two equally specific rules, the later one wins, as the web.dev lesson on the cascade explains. Our guide to fixing GoHighLevel custom CSS that is not working goes deeper into specificity and HighLevel’s changing selectors.
What can go wrong, and what doesn’t a theme install change?
Custom code is unsupported by HighLevel, so a large HighLevel update can require a theme refresh, and agency-level JavaScript runs for every user. A theme changes the web app in the browser; it does not change HighLevel’s mobile app, system emails, permissions or data. Know these limits before you promise clients anything.
HighLevel updates. HighLevel changes its interface regularly and describes custom code as unsupported. A rule that targets an element HighLevel renames or rebuilds can stop working. With your own code, plan to check the theme after major releases. With GHL Dashboard Builder, updates for 12 months (lifetime on Agency) cover keeping the theme in step with HighLevel’s changes.
Script safety. Agency-level JavaScript runs in every user’s browser with that user’s access. The OWASP guide to managing third-party JavaScript names the main risks of loading scripts from outside providers: loss of control over what runs, code that executes with the user’s privileges, and information sent to third parties. In practice: install only code you wrote, code you can read, or code from a provider that states plainly what it does, and remove scripts you no longer use. Our installed code does not read or send your data, and if your install lines were ever shared where they should not be, you can replace them.
The outside server. Hosted lines depend on the provider’s server. If it were unreachable, the theme would not load and HighLevel would show its standard look; your account and data would keep working. That is the trade-off for being able to change and switch off the theme without opening HighLevel’s settings.
What a theme does not change:
- The mobile app. The design restyles HighLevel in a browser, including a phone’s browser. HighLevel’s own app, and the white-label app add-on, are not changed by Custom Code.
- System emails and HighLevel’s own text. Emails follow HighLevel’s templates, and text inside HighLevel’s pages and builders follows HighLevel’s language settings, even when the menu is translated.
- Permissions. Hiding a menu item with a theme hides it; it does not stop a user opening that page by a direct link. Use HighLevel’s user roles and feature settings to control access.
- The login page, through Custom Code. The installed code does not change HighLevel’s login page. From our Pro plan, we design the branded login page with you as a separate step.
- Funnels, websites and forms. These have their own CSS fields, as covered at the start.
Existing scripts. Replacing the contents of Custom JavaScript removes anything else that was there. This is the most common cause of “our chat widget disappeared after the new theme”. The backup step prevents it.
None of these is a reason to avoid a theme. They are the reasons to install one with a backup, a test account and a rollback plan, which is the whole point of this guide. The white-label checklist for GoHighLevel is a useful pass before you roll a new look out to every client, and the hub guide to GoHighLevel dashboard customization shows everything else a theme can change once it is installed.
Should you install the theme yourself or have it installed?
Install it yourself if you are comfortable with HighLevel’s settings and have made the backup; the paste takes minutes. Have it installed if you would rather not touch code that affects every client, or if your Custom JavaScript box already holds scripts you need to keep. Either way, the backup and the test are what make it safe.
Here is how the three common routes compare for the install and the years after it.
| Route | Who pastes the code | Changing the look later | Rollback | Upkeep after HighLevel updates |
|---|---|---|---|---|
| Free theme, pasted yourself | You | Edit the code in HighLevel | Paste your backup | You find and fix breaks |
| Freelance developer | The developer, or you with their files | Another request to the developer | Depends on their process | Paid per fix, or a retainer |
| GHL Dashboard Builder | We install it (one-time $100 setup fee), or you paste two lines | Change the design, press Deploy to live | Turn the theme off, revert and deploy, or clear two boxes | 12 months included, lifetime on Agency |
Our plans are one-time payments with no monthly fees: Starter $280 for 1 design, Pro $480 for up to 3 designs with the menu editor, login page and 15 languages, and Agency $880 for up to 100 designs, a look designed by our team, your own custom code and lifetime updates. Every plan adds a one-time $100 setup fee, for which we install and configure the design in your HighLevel and check every screen. Starter and Pro include 12 months of updates, then optional updates at $99 a year; without them the theme keeps working as it is. The pricing page has the full plan contents.
If you write your own CSS and want the install benefits without hand-editing selectors, our GHL custom CSS page explains how the builder writes the CSS and JavaScript for you, and the GoHighLevel theme builder page shows the design side.
What to do next
- Back up today. Open Settings, Company, Whitelabel, Custom Code in the agency view and copy both boxes into a dated file, even if you are not changing anything yet.
- List your scripts. Note every script in Custom JavaScript and what it does, so a future install does not remove one by accident.
- Pick a test sub-account and user. Choose an internal sub-account and a non-admin user you will use to check every future change.
- Try the look first. Put your colors, logo and menu wording together in the free builder and check it on desktop, tablet and phone.
- Install on one sub-account, then widen. Limit the first install to your test sub-account, walk the screens, then switch it to the whole agency and deploy.